iOS SDK integration
To start using AcquireIO iOS SDK in your project, add one of the following lines to your Podfile according to the version which you wish to integrate.
For more detail, you can also check out our generated iOS docs or review the app store and source code on Github.
The iOS SDK integration in your personal mobile app can be done in two ways :
- Integration using Cocoapods
- Manual Integration
1. Integration using Cocoapods
The steps below use CocoaPods to integrate the AcquireIO SDK.
And run pod install or pod update to refresh your cocoapods dependencies.
For issues installing CocoaPods, see their website for help.
And for any further reference you can always visit our developer's page:
https://developer.acquire.io/ios/sdk-setup-guide/getting-started
2. Manual Integration
You can install our SDK manually using the steps below for iOS.
First, Download AcquireIO iOS SDK.

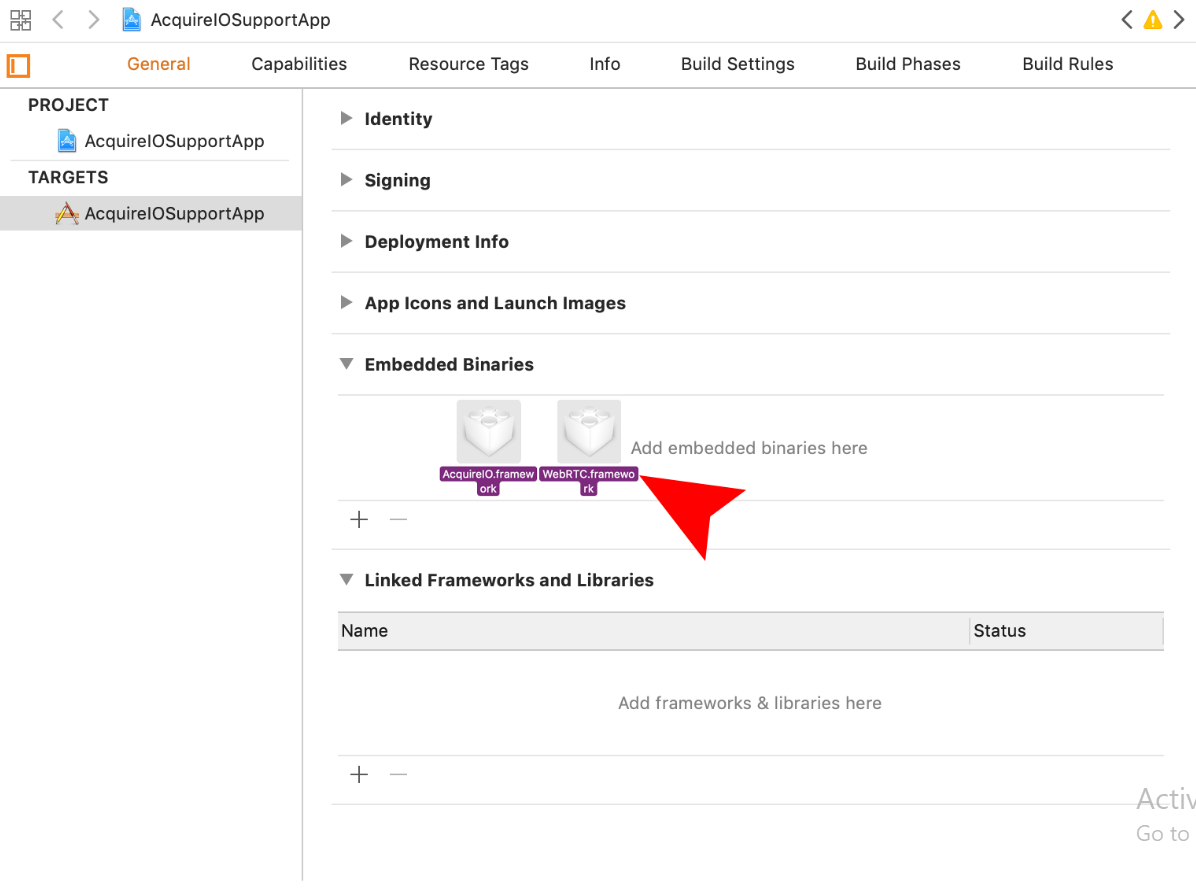
Unzip the SDK & Drop the .framework package into the "Embedded Binaries" list in your targets > general tab. This will add the .framework to "Linked Frameworks and Libraries" as well.
Add the following frameworks to Link Binary with Libraries -
CoreFoundation
CoreGraphics
QuartzCore
UIKit
Then, go to Project/Targets -> [Project Name] -> Build Settings. Search "ALWAYS_EMBED_SWIFT_STANDARD_LIBRARIES" to YES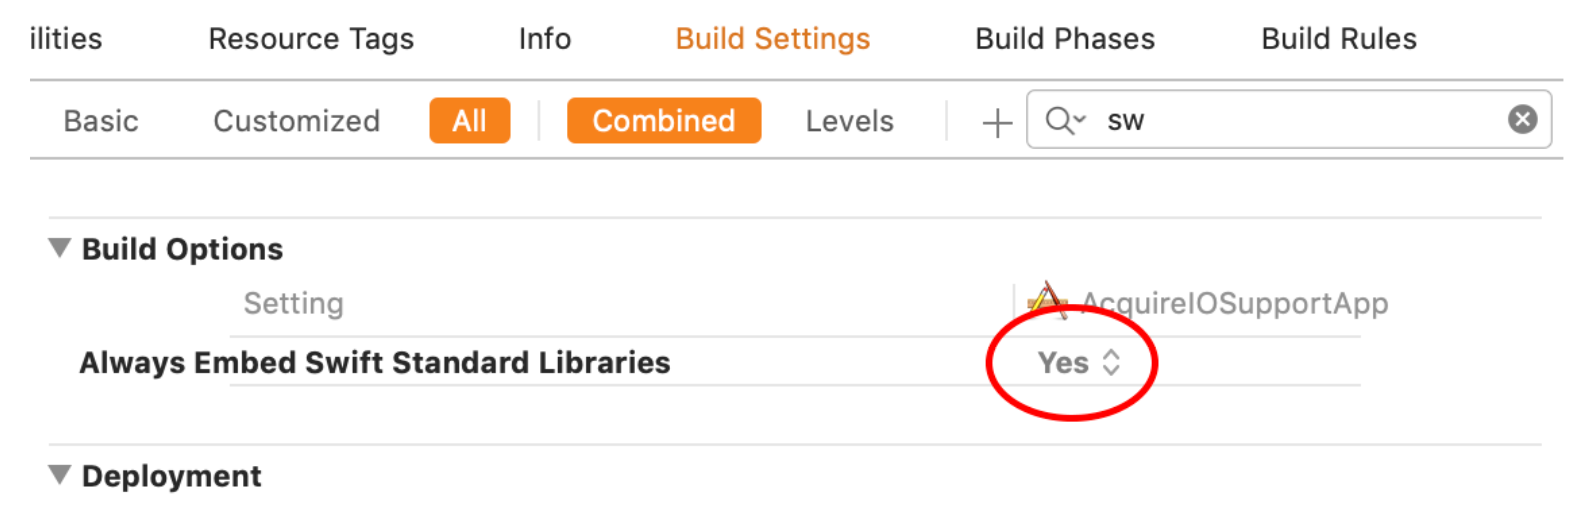
Then Search "Enable bitcode" to NO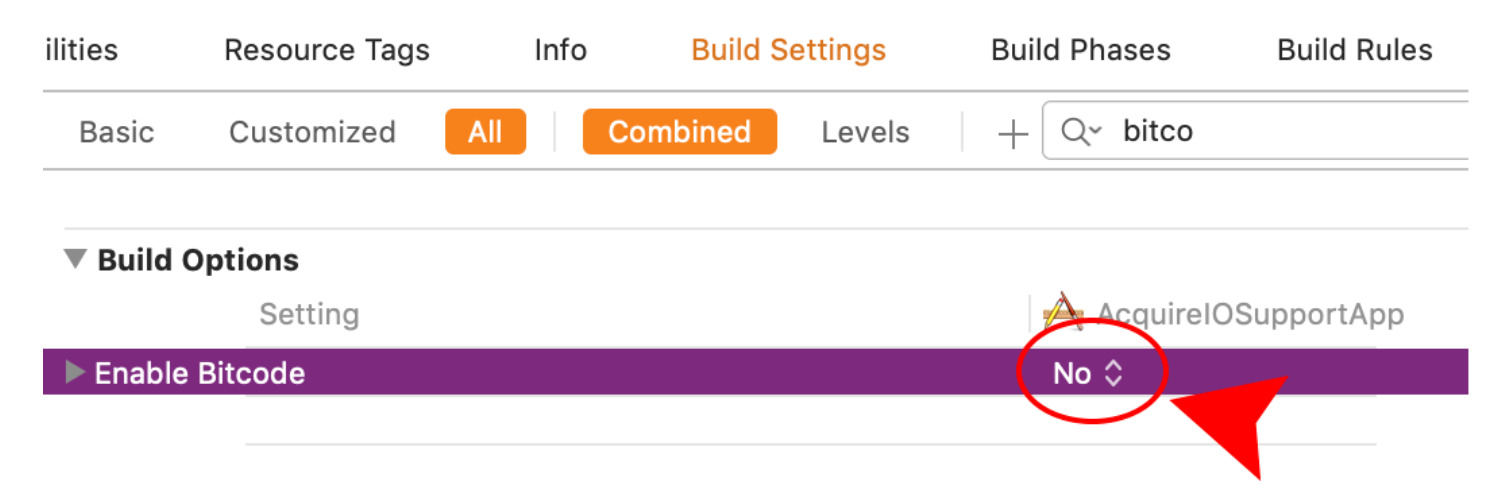
You can also refer our Youtube video for information regarding this:
https://www.youtube.com/watch?time_continue=6&v=45bhaS4iUq4
iOS SDK Configuration Example:
In iOS 10 and beyond, Before you access privacy-sensitive data like Camera, Microphone, and so on, you must ask for the authorization, or your app will crash when you access them.
Open the file in your project named info.plist, right-click it, opening it as Source Code, paste this code below to it. Or you can open info.plist as Property List by default, click the add button, Xcode will give you the suggest completions while typing Privacy - with the help of keyboard.
Remember to write your description why you ask for this authorization, between <string> and </string>, or your app will be rejected by apple:
<!-- Allow Camera -->
<key>NSCameraUsageDescription</key>
<string>$(PRODUCT_NAME) use camera for video chat</string>
<!-- Allow Microphone -->
<key>NSMicrophoneUsageDescription</key>
<string>$(PRODUCT_NAME) use microphone for voice chat</string>
<!-- Allow Photo Library -->
<key>NSPhotoLibraryUsageDescription</key>
<string>$(PRODUCT_NAME) send photo/video to agent</string>
Please visit the following link for detailed instructions:
https://developer.acquire.io/v/master/ios/sdk-configuration-example
iOS Cobrowse SDK:
Acquire has a feature called Cobrowsing which is unique in its sense, as it allows an agent to browse the session with the customer's tab.To use Cobrowse in your own app, you'll need to add our Native SDKs. We've made this as simple as possible, with just a few lines of code.
Once the Native SDKs are added to your app, everything else is done through our web dashboard in any browser - no plugins or installs needed.
And run pod install or pod update to refresh your cocoapods dependencies.
Please visit the following link for detailed instruction
https://developer.acquire.io/v/master/ios/ios-cobrowse-sdk
Theme Setting:
UIAppearance customization is applied to AcquireIO SDK by default. However, if there is a conflicting property, then the value in ThemeOptions key in AcquireIOConfig will take precedence.
For example: If the app uses UIAppearance to change the color of Navigation Bar title and also specifies a color for the same property in the AcquireIOConfig ThemeOptions NSDictionary, then the value in a dictionary will be used. In order to use the UIAppearance value, the app must leave the corresponding entry in the ThemeOptions blank.
If you don't want to use AcquireIOConfig ThemeOptions properties to SDK the use init method attribute option to 'UseDefaultTheme' to @YES.
Please visit the following link for detailed instruction
https://developer.acquire.io/v/master/ios/theme-setting
iOS Push Notifications:
To enable push notifications in Acquire you first need to create a .p12 certificate file of your Apple Push Certificate and upload it to Acquire (we support both production and development .p12 files).
Please visit the following link for detailed instruction
https://developer.acquire.io/v/master/ios/ios-push-notifications
Verify your users:
Enforce identity verification to prevent others from pretending to be (third party) for entertainment or fraud logged-in users.
Generate an HMAC with SHA256 whenever a user logs into your app. Most web frameworks will have a method or library to help you do this. You'll need your app’s secret key and the email of the currently logged-in user.
Secret Key <YOUR_SECRET_KEY>

For example, in Ruby on Rails, we can generate our HMAC using a method called OpenSSL::HMAC.hexdigest, where the first parameter is the name of a hash function (we use SHA256), the second is your secret key, and the third is your user’s email.
OpenSSL::HMAC.hexdigest(
'sha256', # hash function
'<YOUR_SECRET_KEY>', # secret key (keep safe!)
current_user.email # user's email address
)
Logout visitor:
If you have set visitor hash (HMAC digest) and visitor just logged out from the account and need to manage user integrity with an agent, call method logoutVisitor to remove all acquire data from your app related to visitorHash. This must call method to log out from acquireIO support:

Please visit the following link for detailed instructions.