Web and Email Triggers
To Set up a new Trigger, click “Create a Trigger” after clicking the Triggers tab on the left-hand side.

After clicking “Create New trigger” will be the screen where you can design and create a trigger. This page has a few parameters namely Channel, Additional Settings, Audience, Filters, and Chat Widget enable.
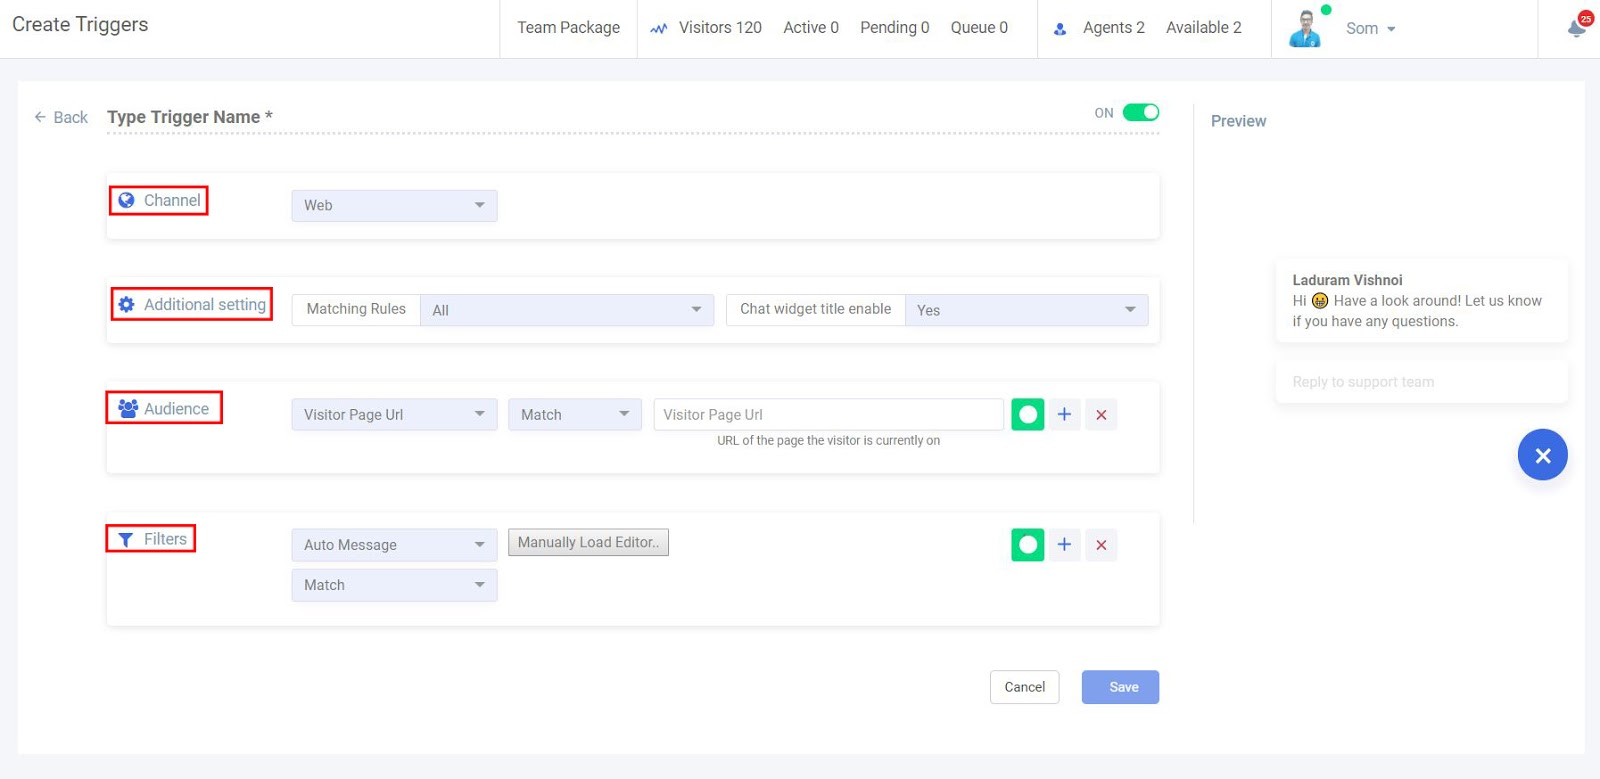
Channel: This will describe what channel or medium you want this campaign on. You can make it a Web, Mobile or Email Campaign. Web Campaigns work for users online on your website, whereas Mobile campaigns work as the name implies for users online through their mobile phones.
Additional Settings: This menu has two settings under it, namely Matching Rules and Chat Widget Title Enable. Matching Rules will allow you to match all or any of the conditions or parameters passes in the Audience section, as you could have one or more set of rules to follow in the Audience section.
If “All” is selected in Matching Rules it will match all the Rules in Audience section and execute the Argument passed in the Filters Section, if “Any” is selected it will see if any condition is matched in the Audience section and Run the argument passed in Filter Section.
Chat Widget Title Enable: This option will have two options of Yes or No and it will allow you to decide if you want to enable the Widget title or just send the argument as it is without any Title to it, in a simple chatbox.
Audience:
The Audience section dictates who will be targetted in a particular triggered Campaign.
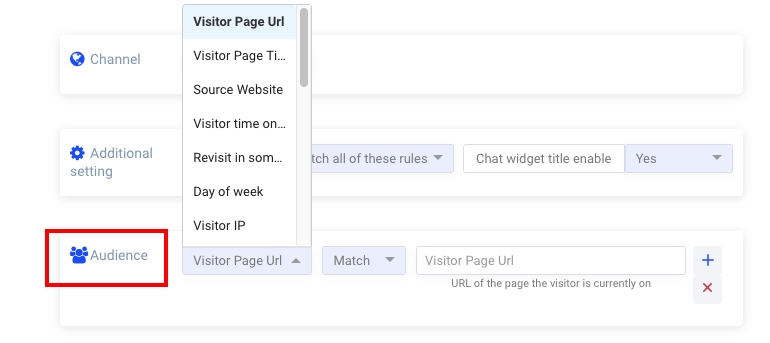
As you will see, you have many options to choose from. So, let’s go through all the options once and then move to filter and create a sample trigger.
Visitor Page URL: This will match the Page URL, the visitor is on.
Visitor Page Title: This will match the Title of the Page, the visitor is currently on.
Source Website: This will take into consideration what website user is coming from, source website.
Visitor Time on Page: This will match the time the user has been on the particular page, time entered here is in seconds.
Revisit in Some Days: This will match the number of days the user has revisited us in.
Day of Week: It will match what day of the week the visitor is visiting our site.
Visitor IP: This will match the IP of the user.
Visitor State: This will give you a choice of which country and state they are from.
Visitor Name: This will allow you to match or specify a visitor name.
Visitor Phone: By selecting in/not in, you can specify the area code and by selecting Equal/not equal, you can specify a particular number.
Browser Name: This will let you choose what browser visitor is coming from.
Browser Version: This will allow you to specify the browser version visitor is using.
OS Name: This will allow you to select the Operating system of the visitor.
OS Version: This will allow you to specify the version of the operating system.
Device Type: This will let you select what platform a user is on, like a Computer, Mobile or Tablet.
Pages Viewed: Here you can specify the value of pages he has visited and bifurcate by less than or more than the number of pages viewed and equal to or not equal to the number of pages viewed.
First Time Visitor: This lets you select if the visitor is a first time visitor on your site.
If Agent Online: This will let you select if the agent is online or not.
Visitor Country: This helps you select the Country of the visitor.
Custom Data Attribute: Any custom data attribute added will be added to the end of the list.
Filters:
This basically defines the action that will take place after all the criteria in the Audience section are met. All the criteria and conditions set in the Audience field are ultimately executed here when the follow-up action is defined here.
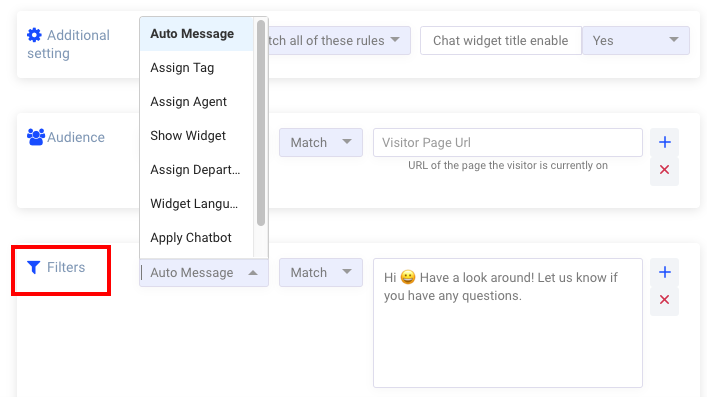
For example, you can assign an agent, department or tag. Moreover, you can apply chatbot, conversation or change widget language accordingly. So let’s have a look at actions that can be performed.
Auto Message: This gives you the liberty of sending any personalized message to your visitor, that can be edited in the textbox just adjacent to it.
Assign tag: You can automatically assign a specified tag to that conversation.
Assign agent: This will help you assign the agent to the chat.
Show widget: This will let you decide whether to show a widget or to hide it from certain user(s).
Assign department: This will let you assign the department to the chats.
Widget language: This will let you automatically change the language of the widget.
Apply Chatbot: This will enable the chat on the selected Audience.
Apply Conversation: This will let you bucket the chats in conversations accordingly.