Integrations
Salesforce Lightning
The Salesforce App Lightning integration in Acquire allows you to Cobrowse with your contact, lead, and account details on the record page.
Installation:
https://appexchange.salesforce.com/appxListingDetail?listingId=a0N3A00000FtTCzUAN
(For Installation Salesforce Package Contact to Acquire Team hello@acquire.io)
Configuration:
After installing package Open lightning in the Acquire app and follow instructions.
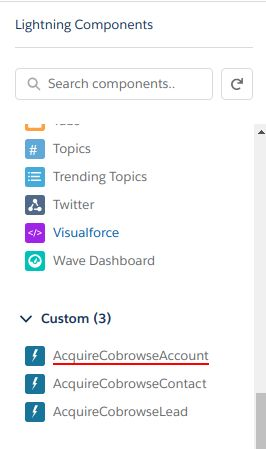
Acquire Lightning App in we provide three types of components to use lead, contact and account records.
Three Component:-
1. AcquireCobrowseAccount:- This Component Work Only Account records page.
2. AcquireCobrowseContact:- This Component Work Only Contact records page.
3. AcquireCobrowselead:- This Component Work Only Lead records page.
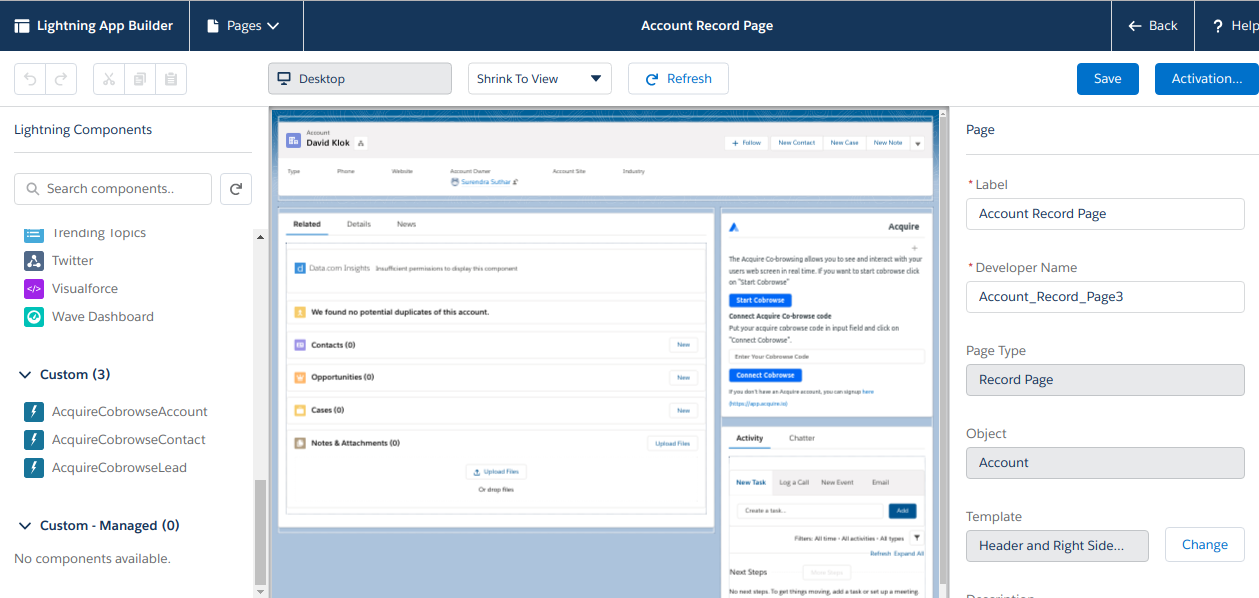
1. Account Record Page Setup:
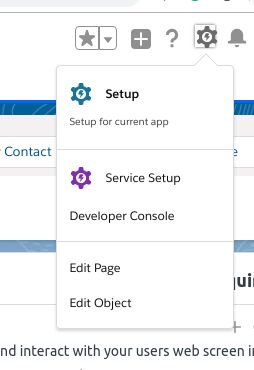
Acquire Component ‘AcquireCobrowseAccount’ use in the account record page. An account in open a record and click on the top menu icon in setting > Edit page.
Account record page edit view in right side dropdown ‘Lightning Components’ in find Custom > ‘AcquireCobrowseAccount’ Components and drag-drop page view in the right sidebar and click on save.
If you setup this first time then save and create ‘Activation’. Click on right corner button ‘Activation’ and assign org to access Acquire app go ‘ORG DEFAULT’ in click on ‘Assign as Org Default’.
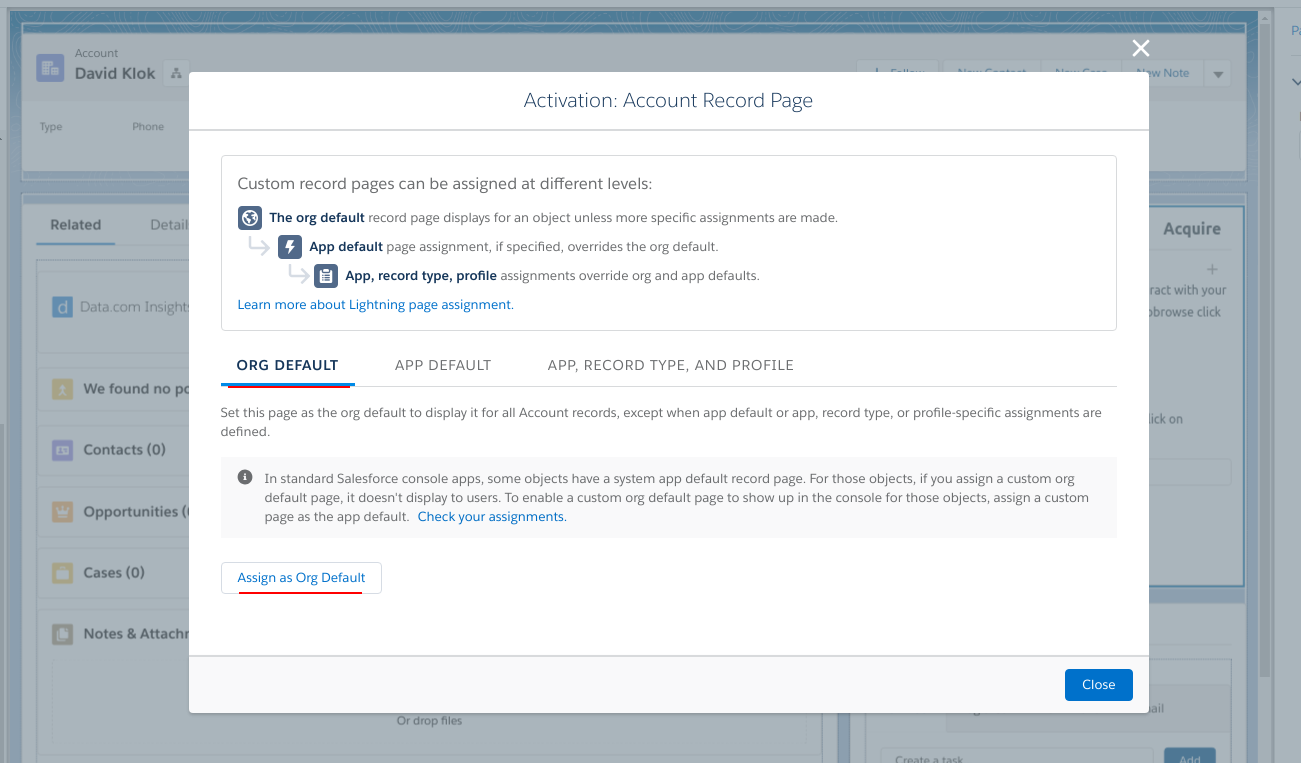
Choose ‘System Default’ org and save. If you not see ‘System Default’ and showing other org then first remove org and save the page. After following this process again.

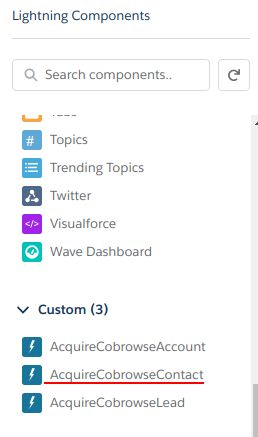
2. Contact Record Page Setup:
This page in following all instructions same as account page and choose custom component ‘AcquireCobrowseContact’.
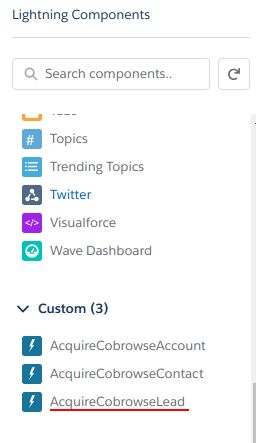
3. Lead Record Page Setup:
This page in following all instructions same as a contact page and choose custom component ‘AcquireCobrowseLead’.
After this all setup you can use acquire app any environment like sales, service, etc. its given access to every app.
Setup Co-browse
We are providing two methods to use co-browse. When you start cobrowsing first login acquire in your browser.
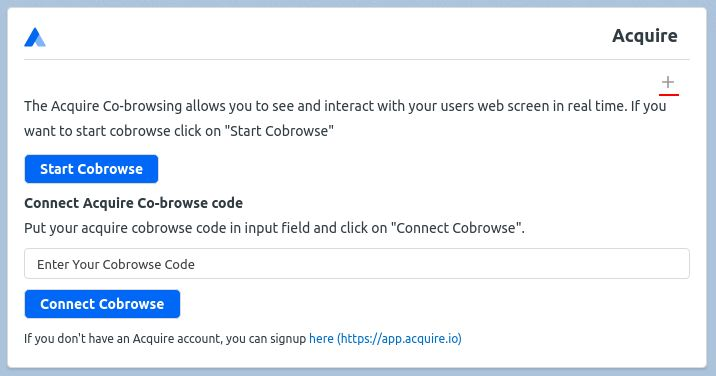
1. Single click button Co-browsing
2. Co-browse with your custom code.
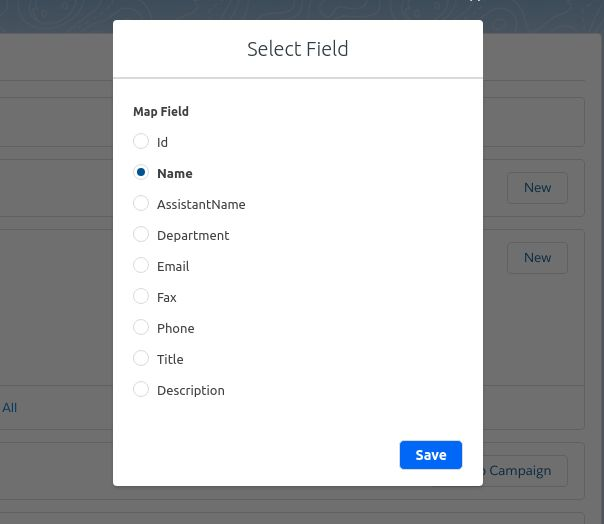
1. Single click button Co-browse
First, you need to click + icon button, then select any one field from there, its required to an automated system saved it. Then click ‘Start Co-browse’ button. You can able to use Acquire Co-browse now.
Cobrowse Code API (frontend)
Acquire Cobrowse ‘Start Cobrowse’ in saved value push dynamic use to acquire API.
Visit: Acquire Co-browse code API (https://developer.acquire.io/v/master/co-browse-apis/acquire-co-browse/api).
In your chat script add this API code as well with your “unique code” or “custom_code” at frontend side. Keep remembering this code to connect with co-browse.
Note: if you didn’t save any field then ‘Start Co-browse’ will not work and will appear disabled.
2. Co-browse with your custom code
With this step, you need to pass you any “unique code” or any “custom_code”. Your frontend side in add acquire cobrowse API with widget code and push your dynamic visitor details or custom code.
Now enter this code to the input field and click to “Connect Cobrowse” button.