Integrations
Salesforce Service Cloud
Acquire Cobrowse With Service Cloud
Acquire Cobrowse Package with Salesforce Live Agent allows you to Cobrowse with an online visitor.
Installation
Install package ‘Acquire’ in your Salesforce account.
https://appexchange.salesforce.com/appxListingDetail?listingId=a0N3A00000FtTCzUAN
(For Installation Salesforce Package Contact the Acquire Team support@acquire.io)
Configuration
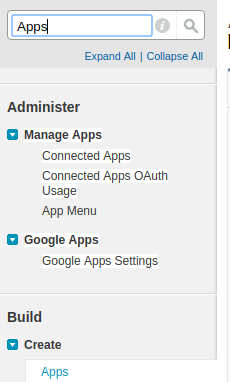
After install Package, you set up with your live agent app. Find Quick Search in ‘Apps’ and click on the dropdown menu ‘Apps.’ Choose your console app and edit ( using for service cloud).
Edit View in find ‘Include Live Agent in this App’ and check this. After checked you see below list in check ‘New Visualforce page.’
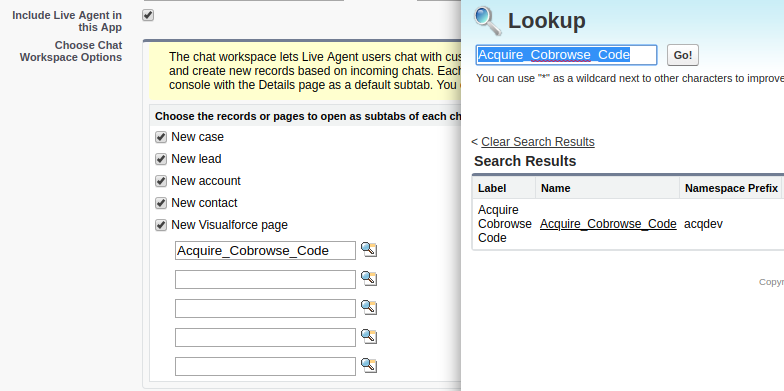
New Visualforce page in click on the search button and choose to acquire visual force page ‘Acquire_Cobrowse_Code’ and save this app. Now your backend process completed.
Frontend Setup
First, open your fronted chat start button page and see your live agent setup code in ‘liveagent.init’ script. For enabling acquire single click button put a script above ‘liveagent.init’.
Important: Put Code Script Above ‘liveagent.init’ – liveagent.addCustomDetail(‘Acquire_Custom_Code’,’YOUR_CUSTOM_CODE’);

Note: Above function param ‘Acquire_Custom_Code’ is not making any changes. You can put only your custom code and Use this function before ‘liveagent.init’.
‘YOUR_CUSTOM_CODE’ replace to your custom unique random code string.
Same ‘YOUR_CUSTOM_CODE’ use as a acquire Cobrowse code in Acquire script after the widget.
For Acquire Cobrowse Code Visit: https://developer.acquire.io/v/master/co-browse-apis/acquire-co-browse/api
window.acquire = window.acquire || [];
acquire.push({
custom_cobrowse_code: YOUR_CUSTOM_CODE
});
If you want to help for manage random code and use in acquire script see acquire test page’s view source: https://docs.acquire.io/salesforce.html.
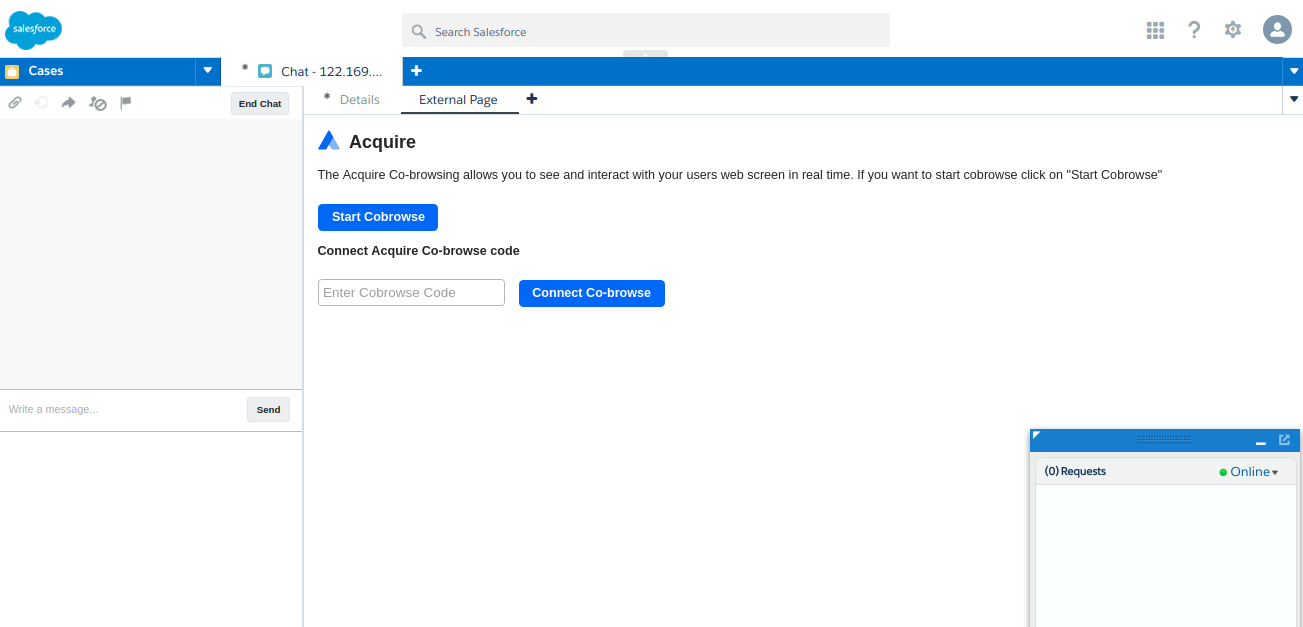
After completing all the steps, you can use the app to ‘Start Cobrowse’ with a single click button.
Start Cobrowsing
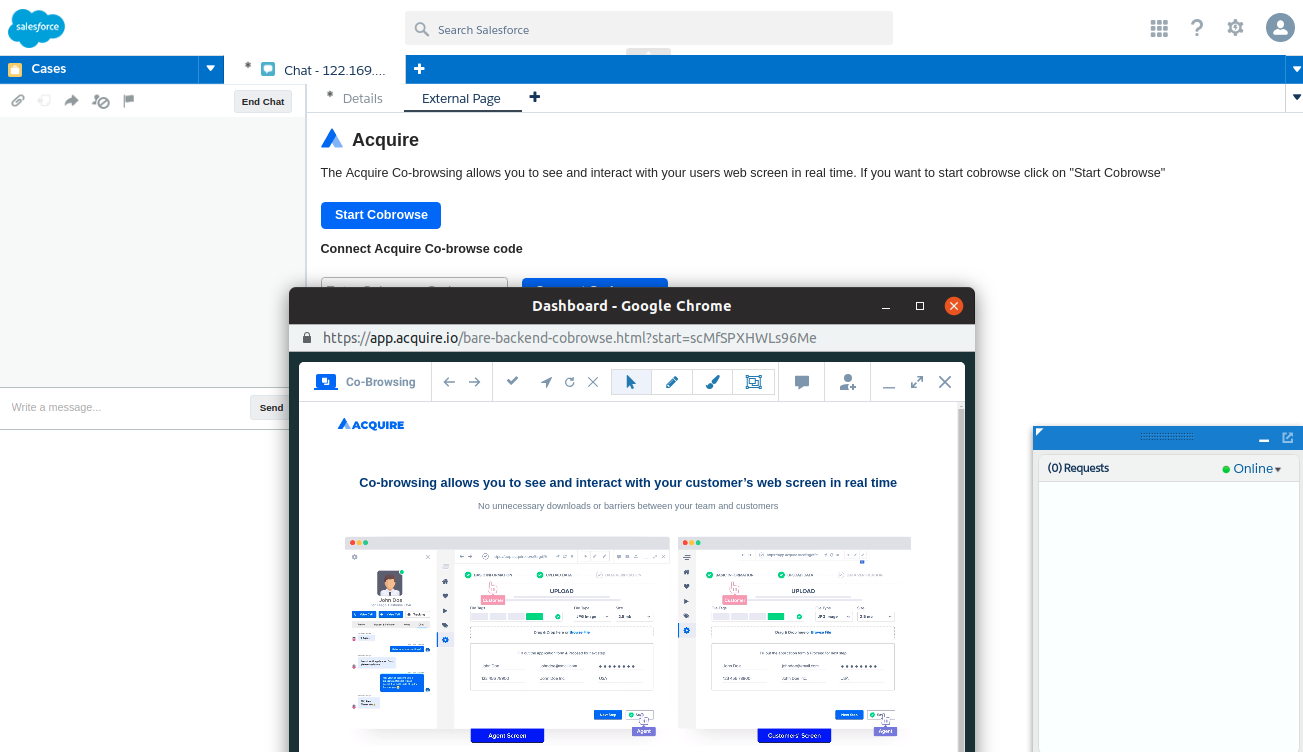
After this, open your console app and set user status to online.
Send a request to your frontend page and accept the request from the agent side. After accepting the request, you see some tabs open on the user side.
Setup Cobrowse:
We are providing two methods to use co-browse.
1. Single click button Co-browsing
2. Co-browse with your custom code.
1. Single click button Co-browse
To click on the ‘Start Co-browse’ button. You can able to use Acquire Co-browse now.
Note: if you set up all frontend and backend process after you can use this.
Cobrowse Code API (frontend)
Acquire Cobrowse ‘Start Cobrowse’ in saved value push dynamic use to acquire API.
Visit: Acquire Co-browse code API (https://developer.acquire.io/v/master/co-browse-apis/acquire-co-browse/api).
In your chat script add this API code as well with your “unique code” or “custom_code” at the frontend side. Keep remembering this code to connect with co-browse.
Note: if you didn’t save any field, then ‘Start Co-browse’ will not work and will appear disabled.
2. Co-browse with your custom code
With this step, you need to pass you any “unique code” or any “custom_code.” Your frontend side in add acquire cobrowse API with widget code and push your dynamic visitor details or custom code.
Now enter this code to the input field and click to “Connect Cobrowse” button.