Integrations
Salesforce
With this integration, your sales team will be able to track every lead who has communicated with you on live chat as leads or contacts. The Acquire and Salesforce integration enable you to measure the performance of every sales representative and to make data-driven decisions.
Step 1. Configure Acquire and Salesforce
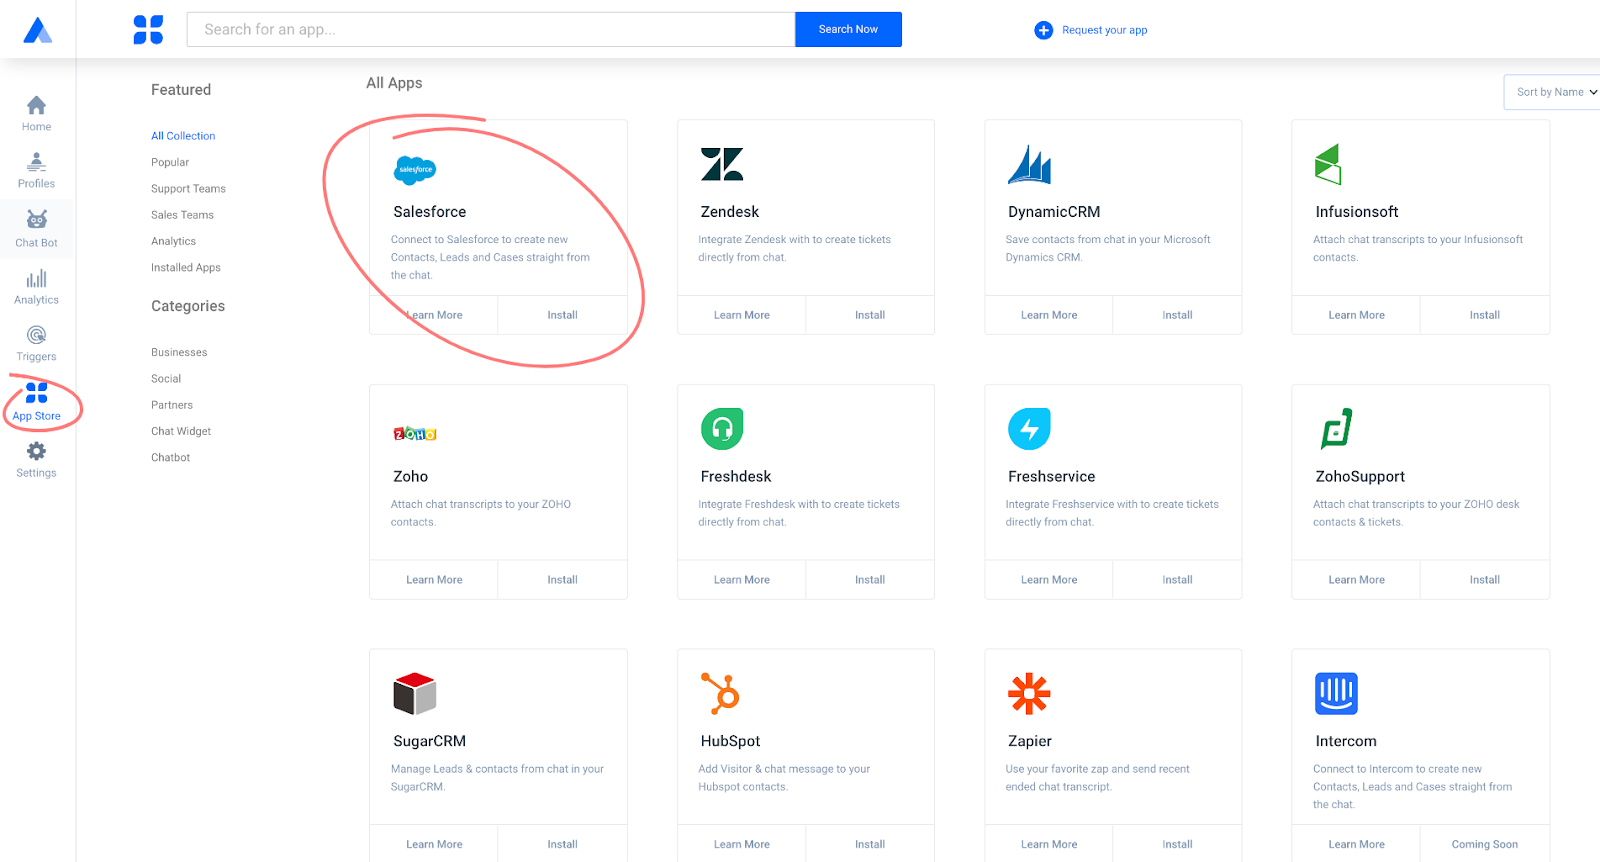
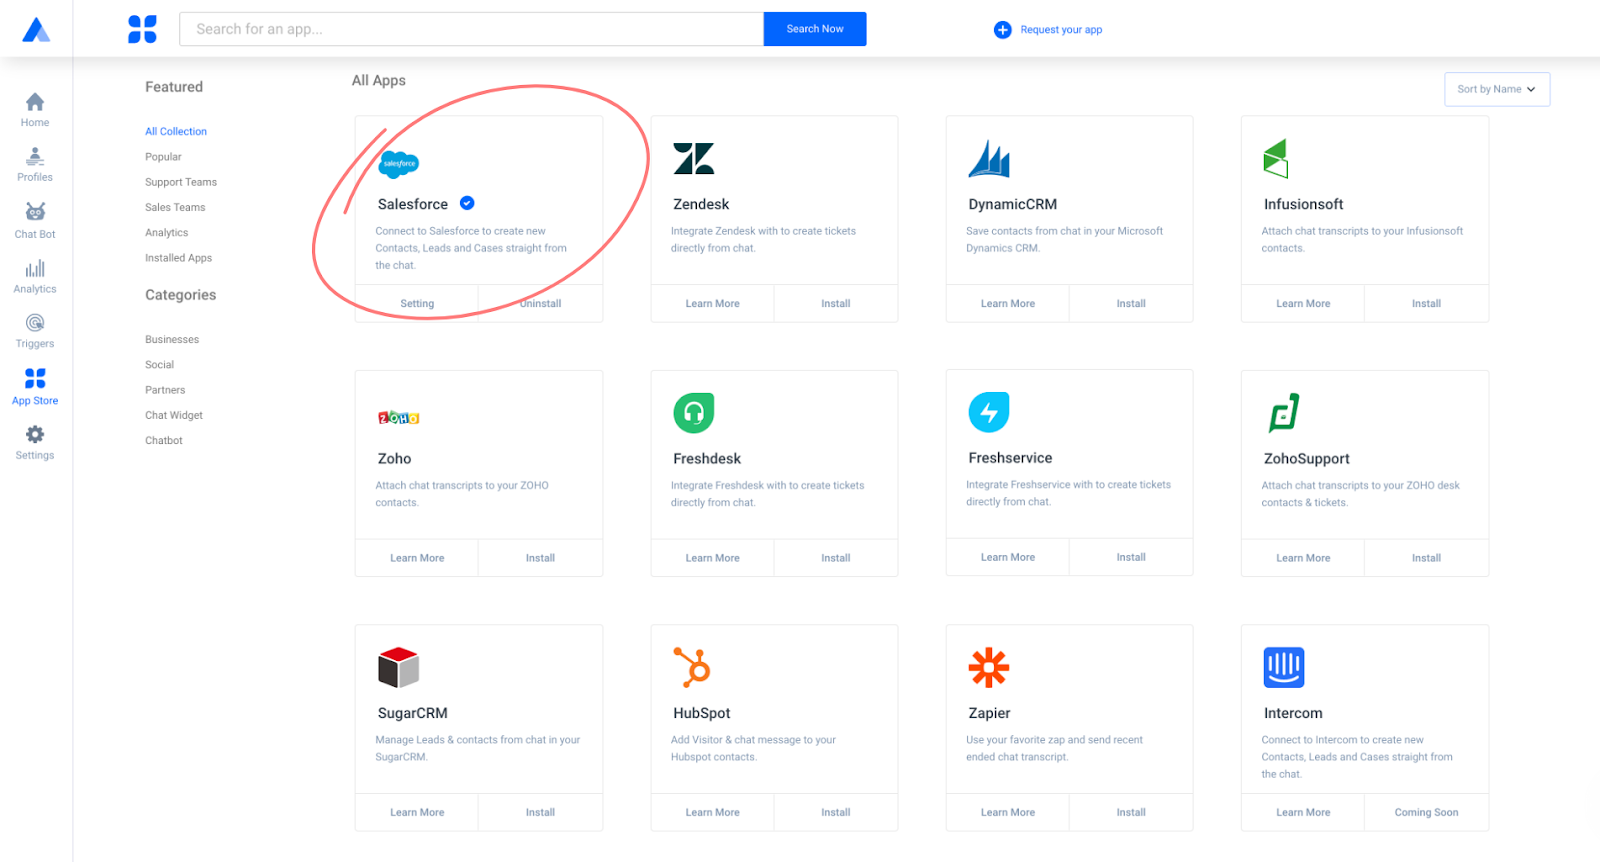
Go to https://app.acquire.io/app-store and search for Salesforce in the search bar. Next, click ”Install” in the Salesforce icon.
Step 2. Configure Salesforce
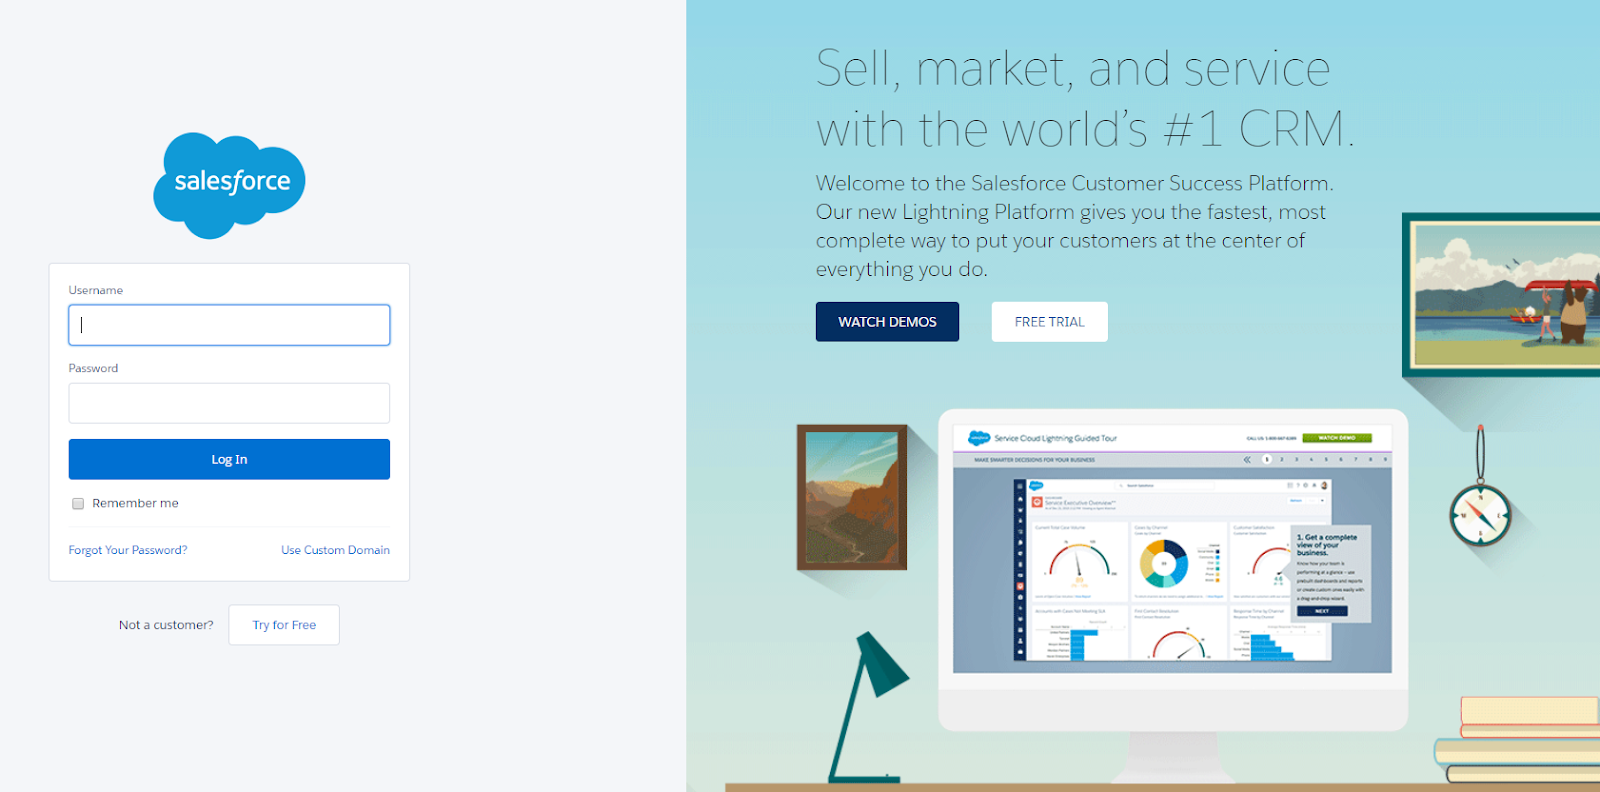
After entering your salesforce login information, you will be asked to choose Mapping configuration
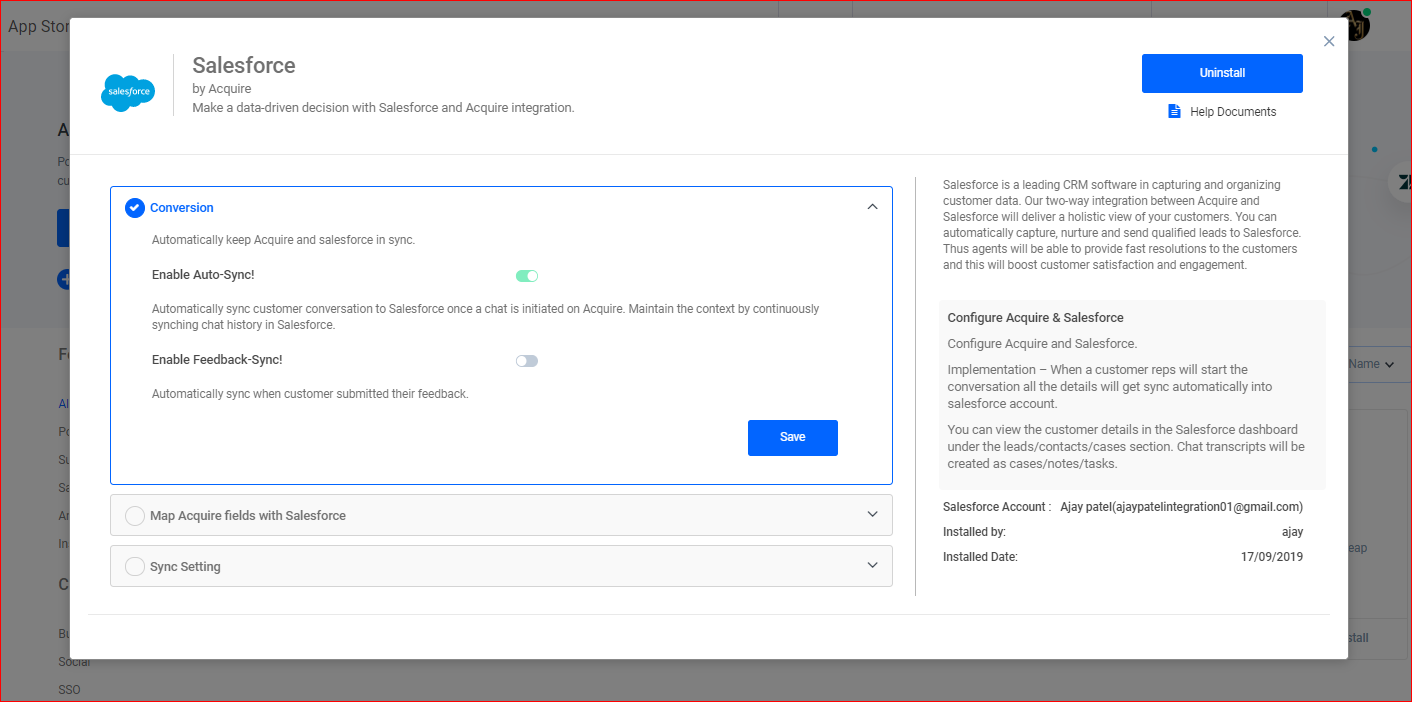
Conversion:
Enable Auto-Sync!
Automatically sync customer conversation to Salesforce once a chat is initiated on Acquire. Maintain the context by continuously synching chat history in Salesforce.
Mapping Configuration:
Salesforce manual Mapping Configuration can be done in 4 ways via a:
Contact
Lead
Account
Or Case
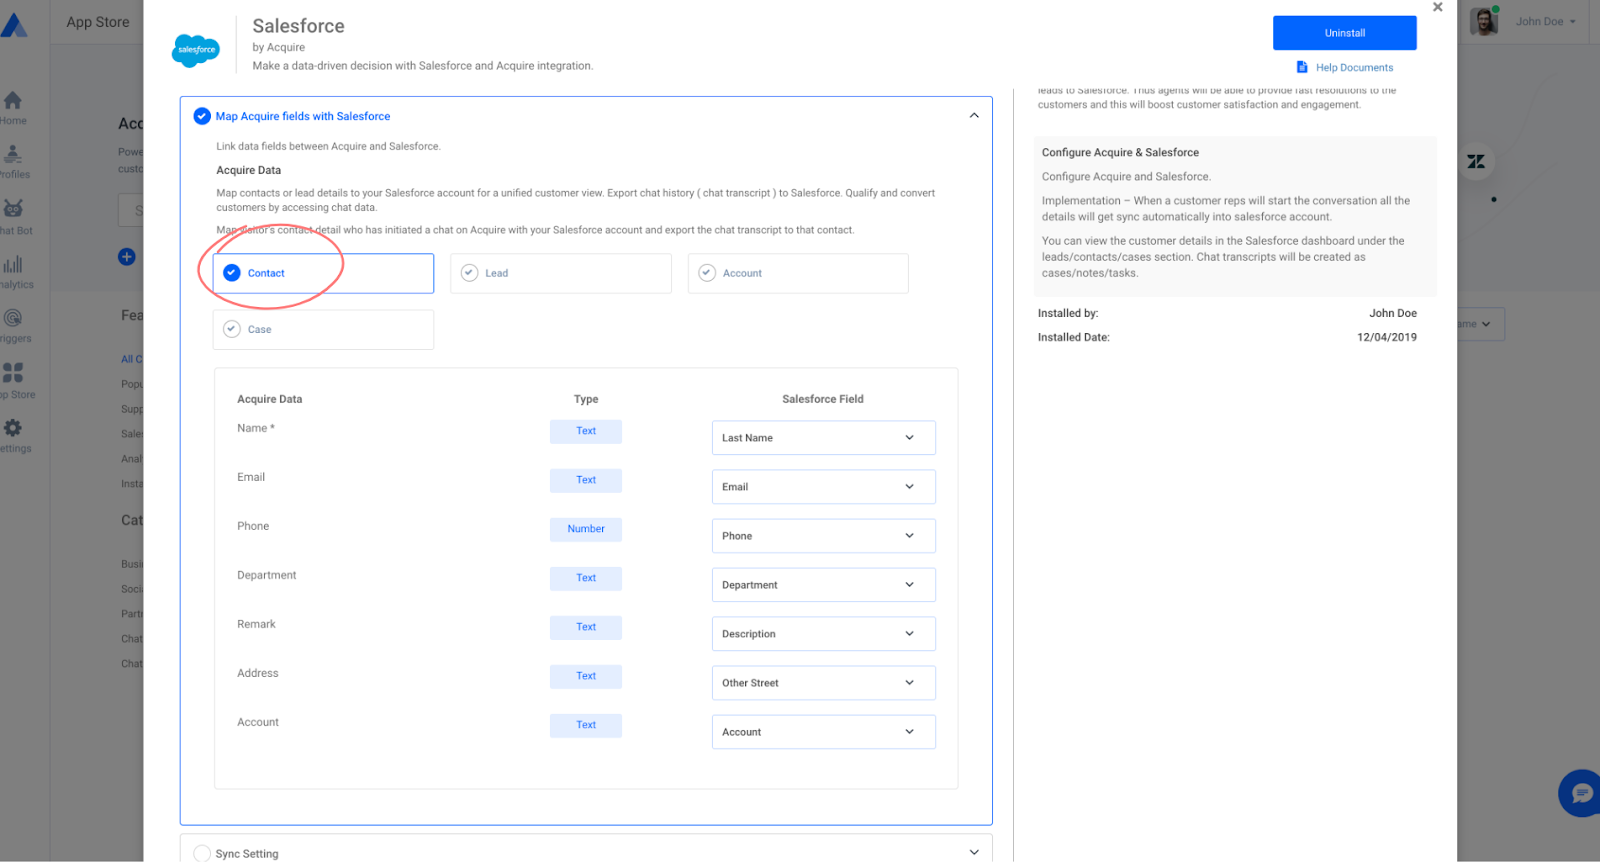
1. Contact Mapping
Here the mapping is done with visitor contact details. The new contact is created when a visitor starts a chat with an agent. All chats get synced/exported from Acquire to Salesforce. In this Contact Mapping, custom fields can also be added. An account is required to create Salesforce contact, so it can map only with the salesforce field.
Account custom fields are automatically inserted in your custom fields.
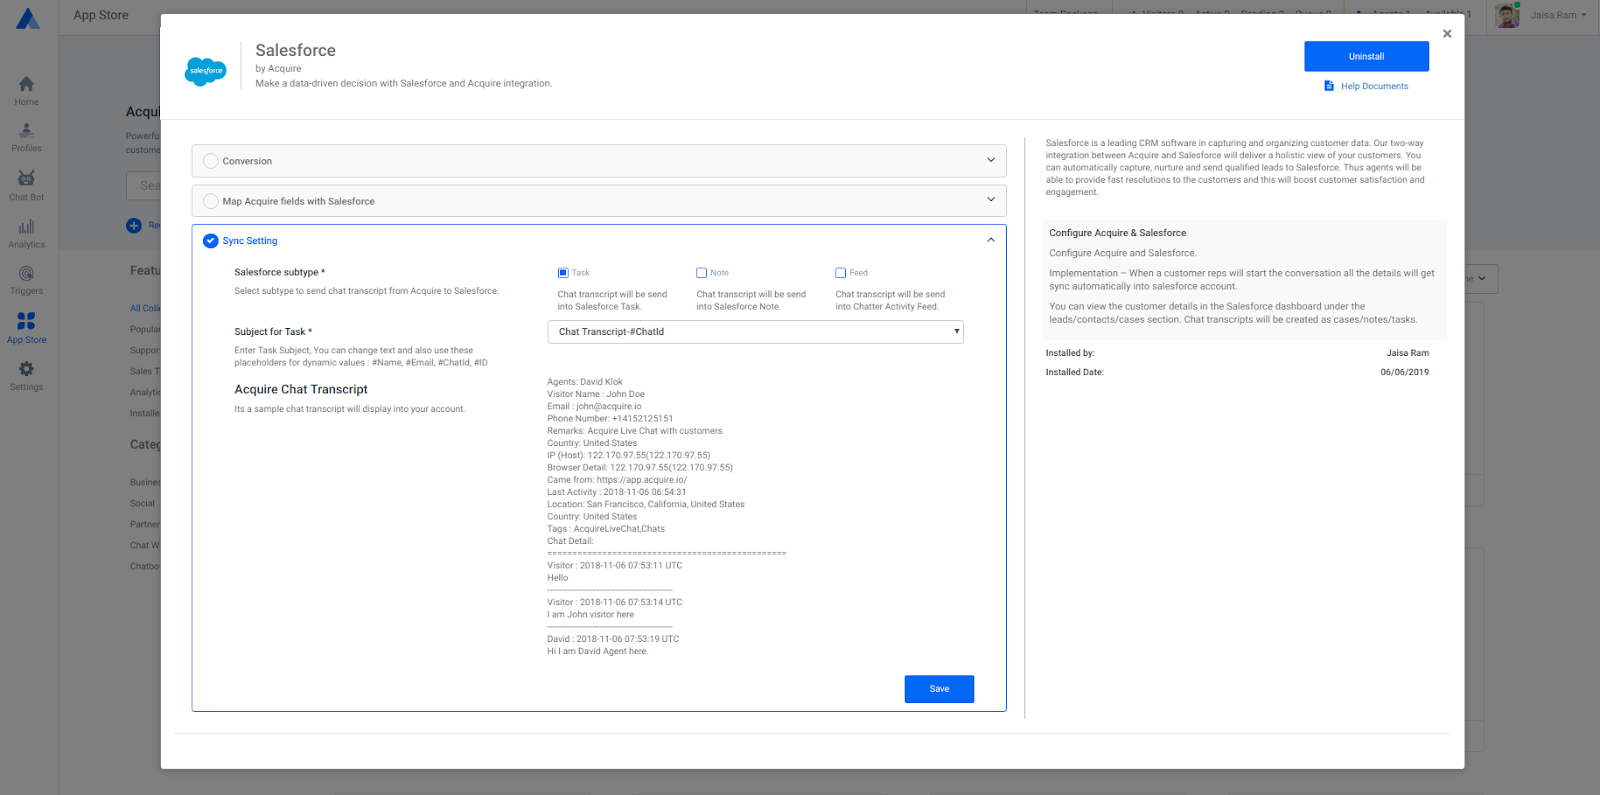
Contact Sync Setting
Select the subtype to send a chat transcript from Acquire to Salesforce. Enter Subject/Title; You can change text and also use these placeholders for dynamic values: #Name, #Email, #ChatId, #ID

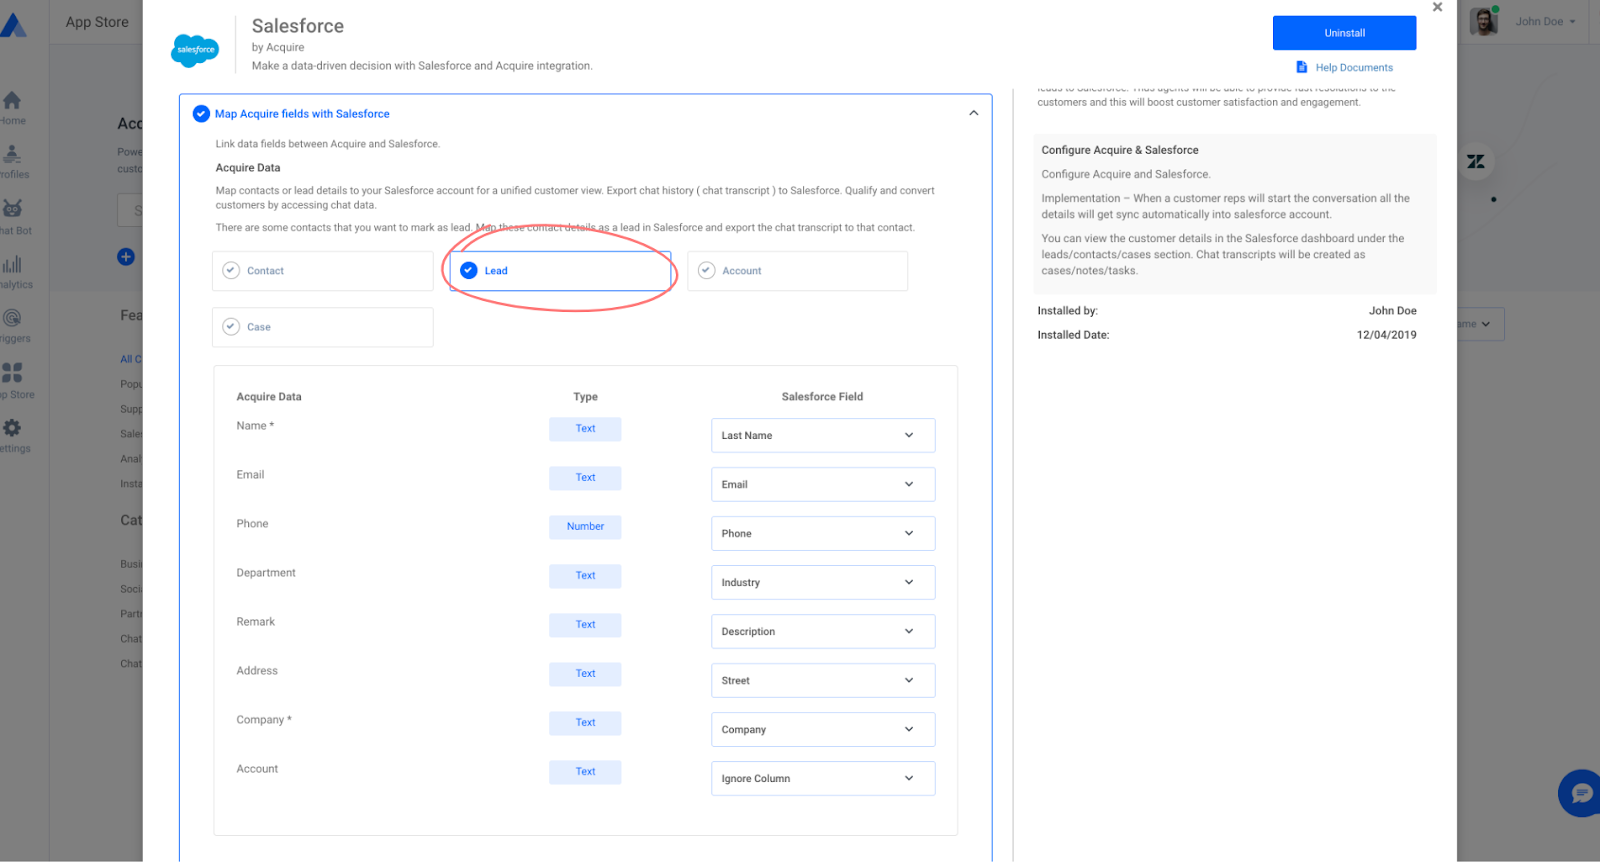
2. Lead Mapping
Automatically sync customer conversation to Salesforce once a chat is initiated on Acquire. Maintain the context by continuously synching chat history in Salesforce.
Same as above, but here the details will get stored under the lead section. Salesforce will create a new lead when chat sync/export from Acquire to Salesforce. A company is required to create salesforce lead, so it maps only with the company salesforce field.
The company custom fields are automatically inserted in your custom fields.
Lead Sync Setting
Select the subtype to send a chat transcript from Acquire to Salesforce. Enter Subject/Title; You can change text and also use these placeholders for dynamic values: #Name, #Email, #ChatId, #ID
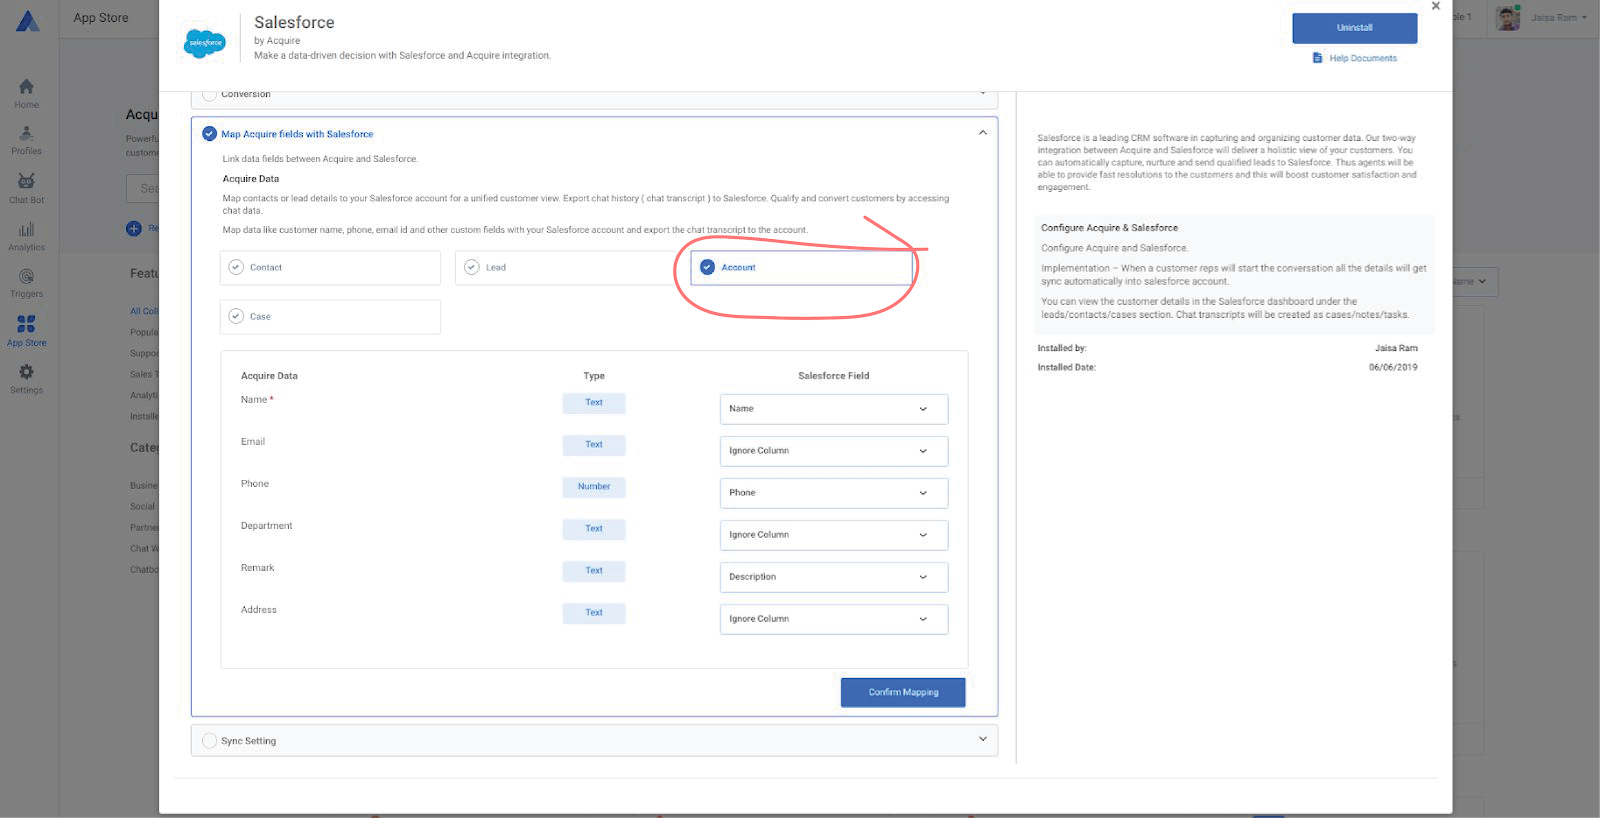
3. Account Mapping
In this account configuration, an account is created, and chats are synced/exported from Acquire to Salesforce.
You can map all required fields in salesforce with Acquire fields and add custom fields so you can map more fields.
Account Sync Setting
Select the subtype to send chat transcript from Acquire to Salesforce. Enter Subject/Title; You can change text and also use these placeholders for dynamic values: #Name, #Email, #ChatId, #ID
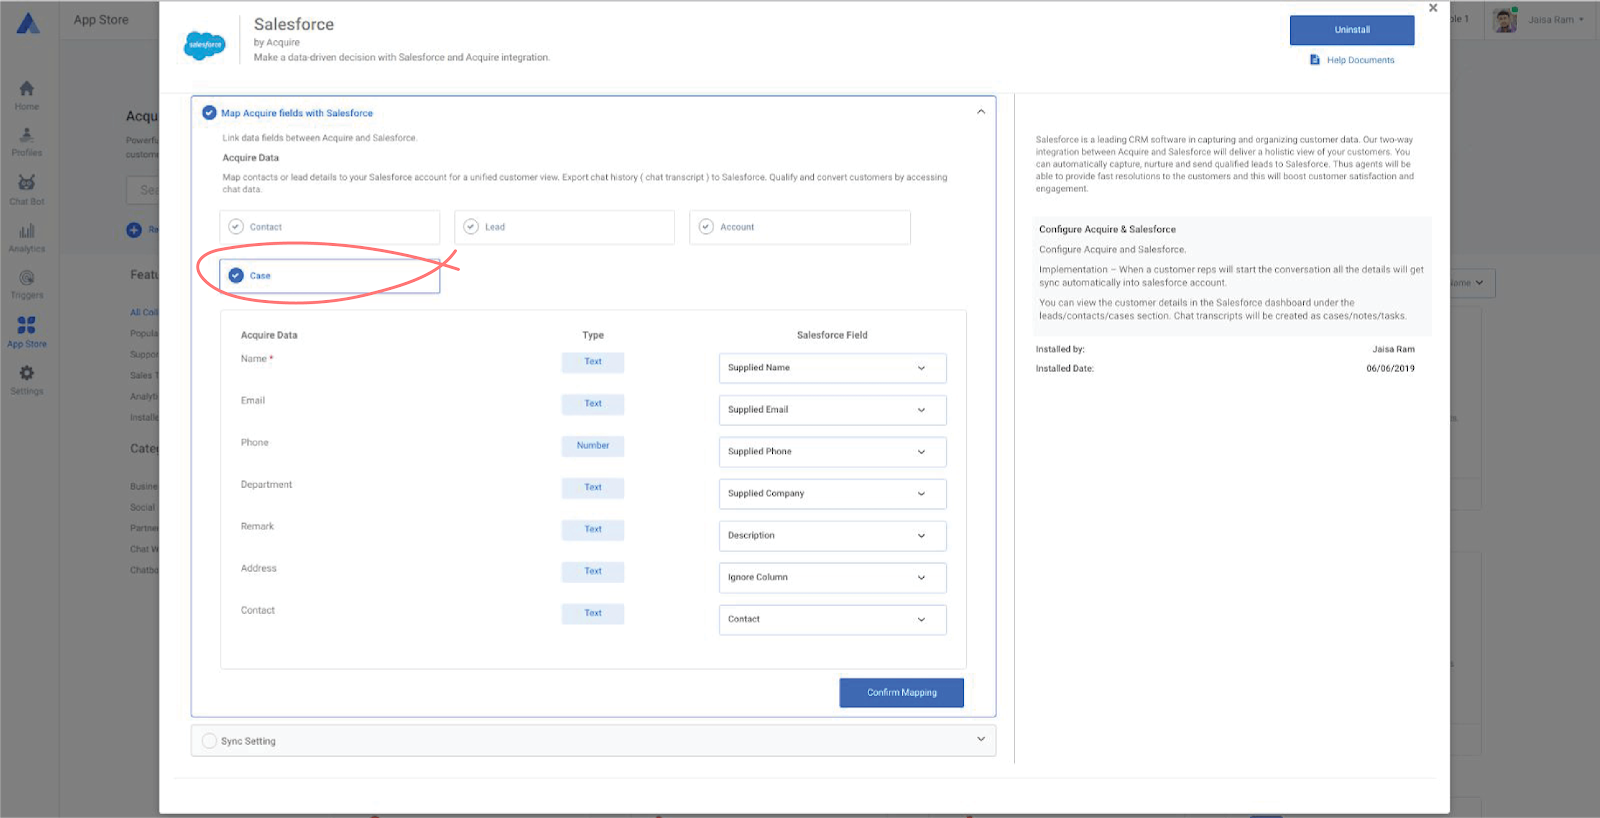
4. Case Mapping
Same as above, but here the details will get stored under the case section. Salesforce will create a new case when chats are synced/exported from Acquire to Salesforce.
Contact custom fields are automatically inserted in your custom fields.
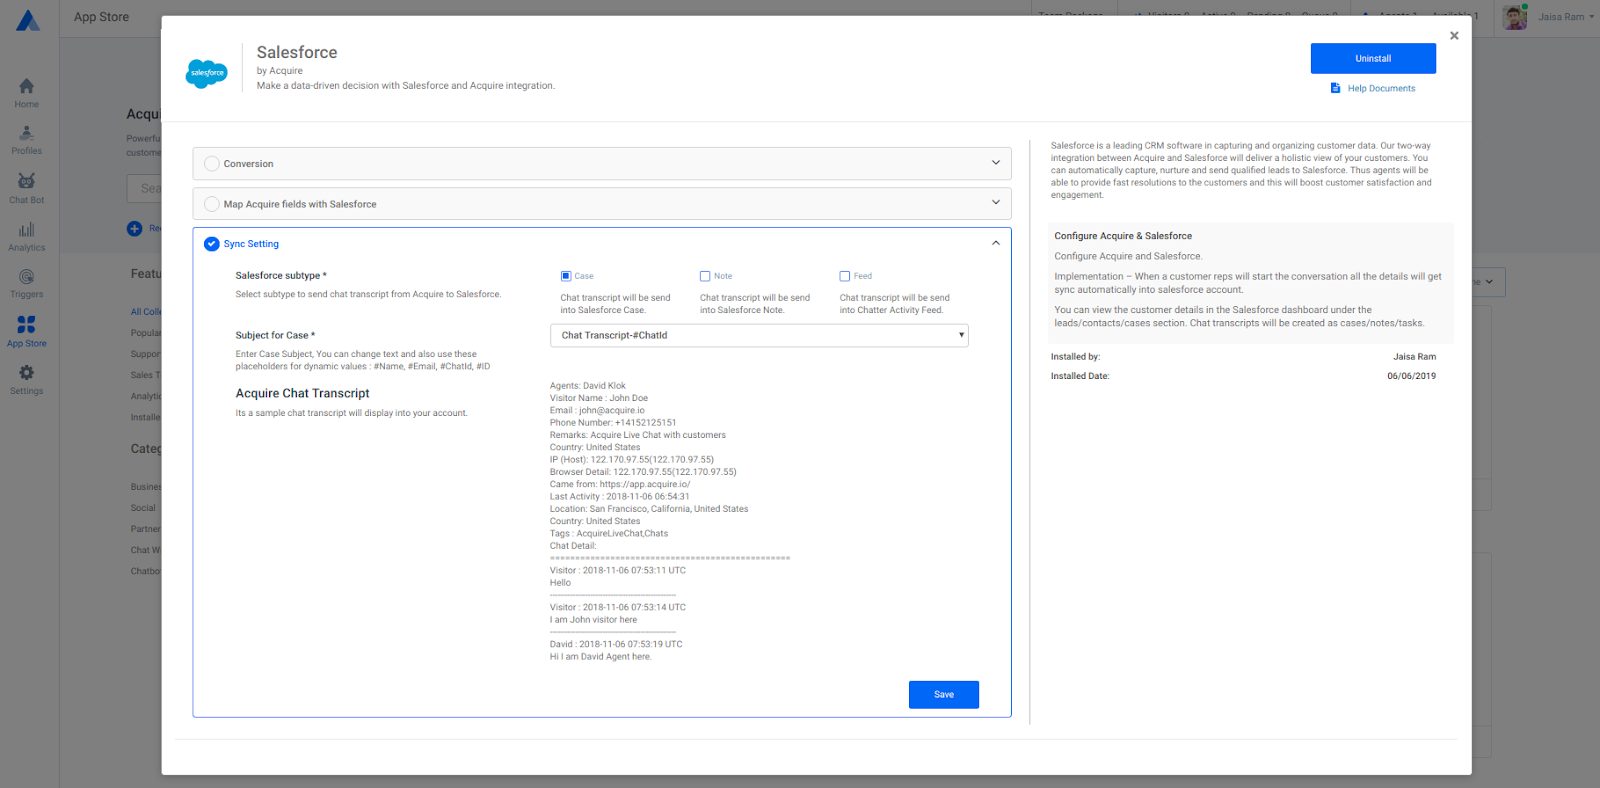
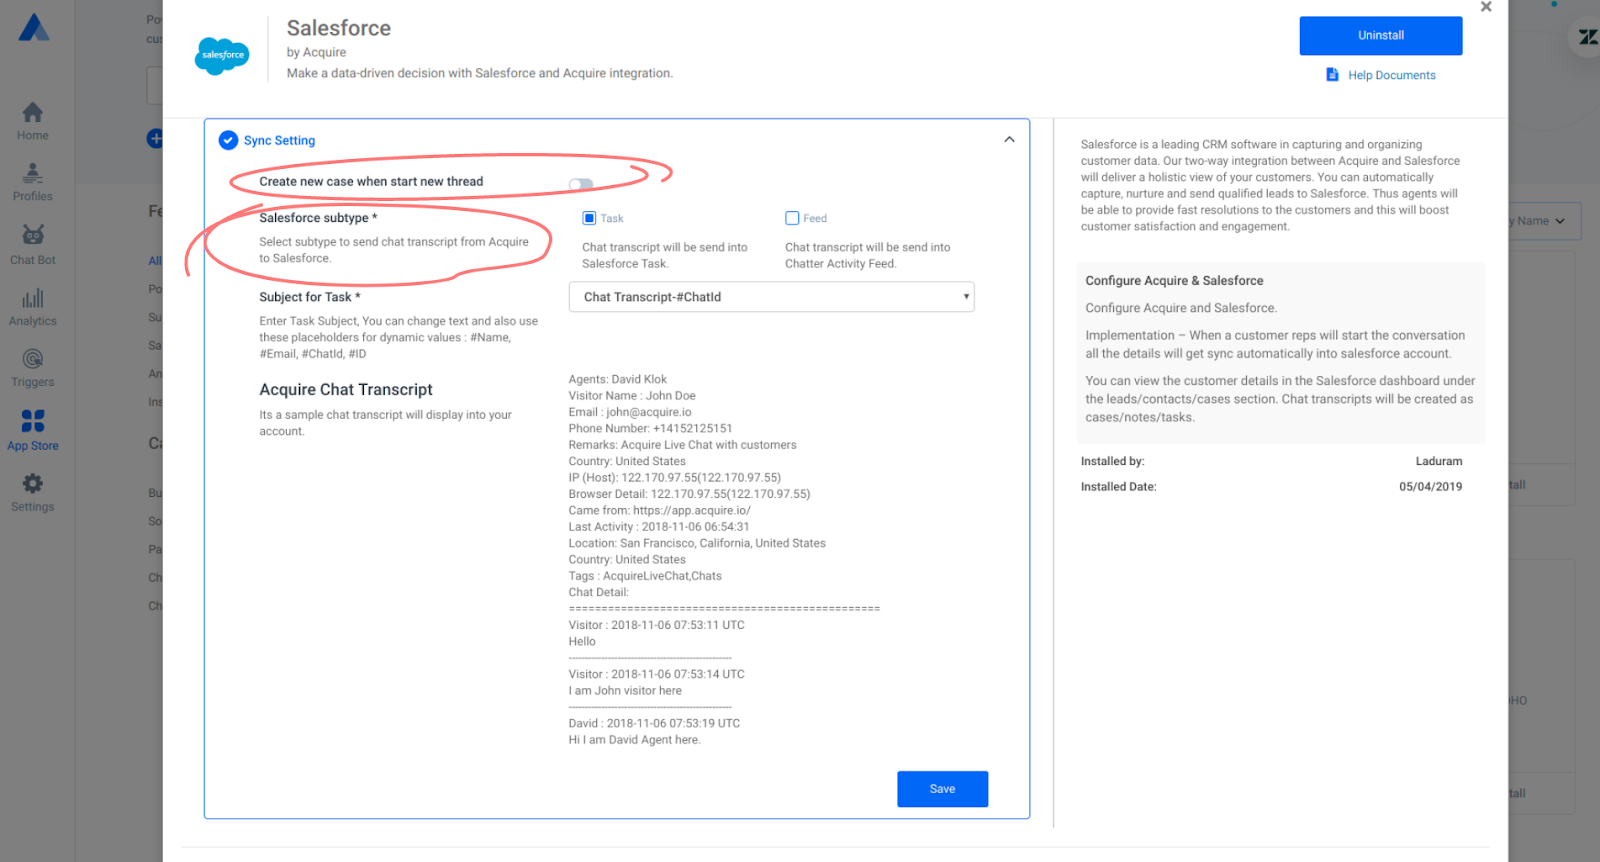
Case Sync Setting
Enable the setting: “Create new case when start a new thread.”
Send chat transcript into subtype. You can also add a subject/title.
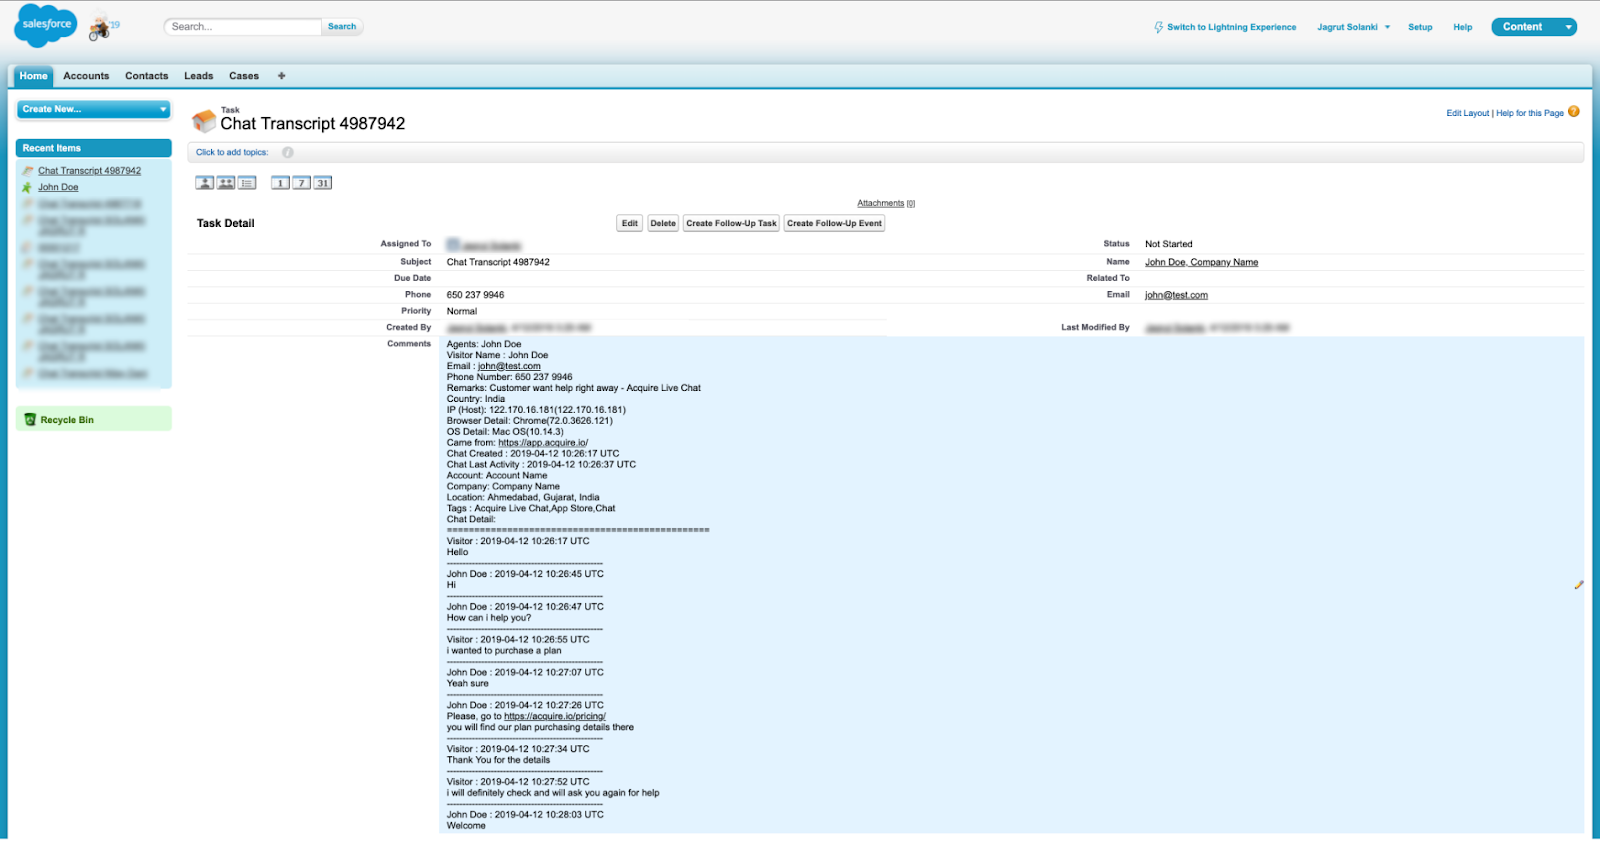
Step 3. Sync Chat
After Configuring Salesforce you can sync your chat transcripts as a Contact/Lead/Account/Case.
Salesforce CRM Suggestions
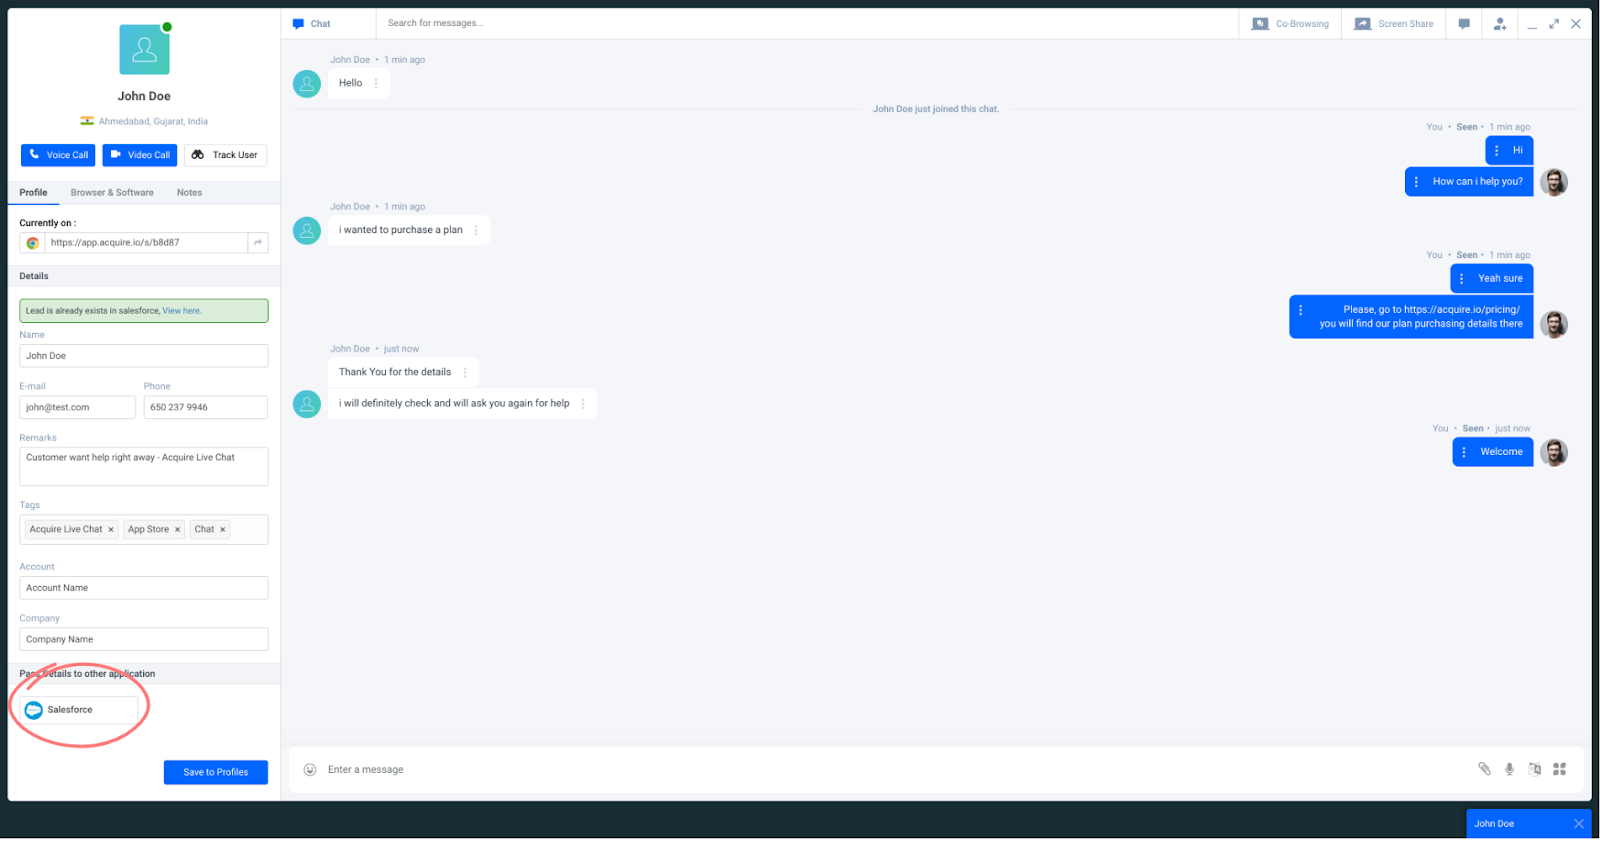
A suggestion will be shown according to your configuration like Contact/Lead/Account/Case which you have configured.
If a visitor already exists in Salesforce CRM, then a message will be displayed as already exists, you can also view details.
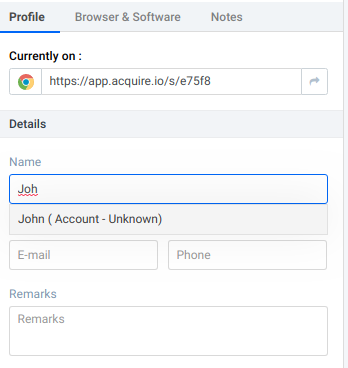
Search by Visitor Name:
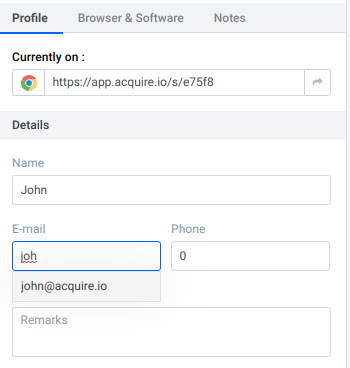
Search by Visitor Email:
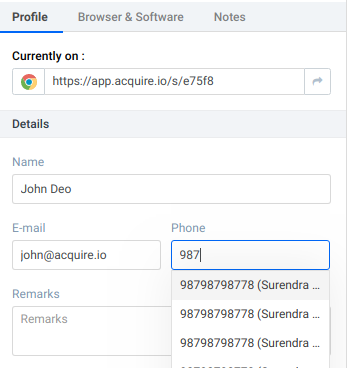
Search by Visitor Phone:
Search by Account or Company:

It will depend on your default configuration, like if you configure mapping with Contact, then you can search from Account, if you have mapped with lead then search by Company.
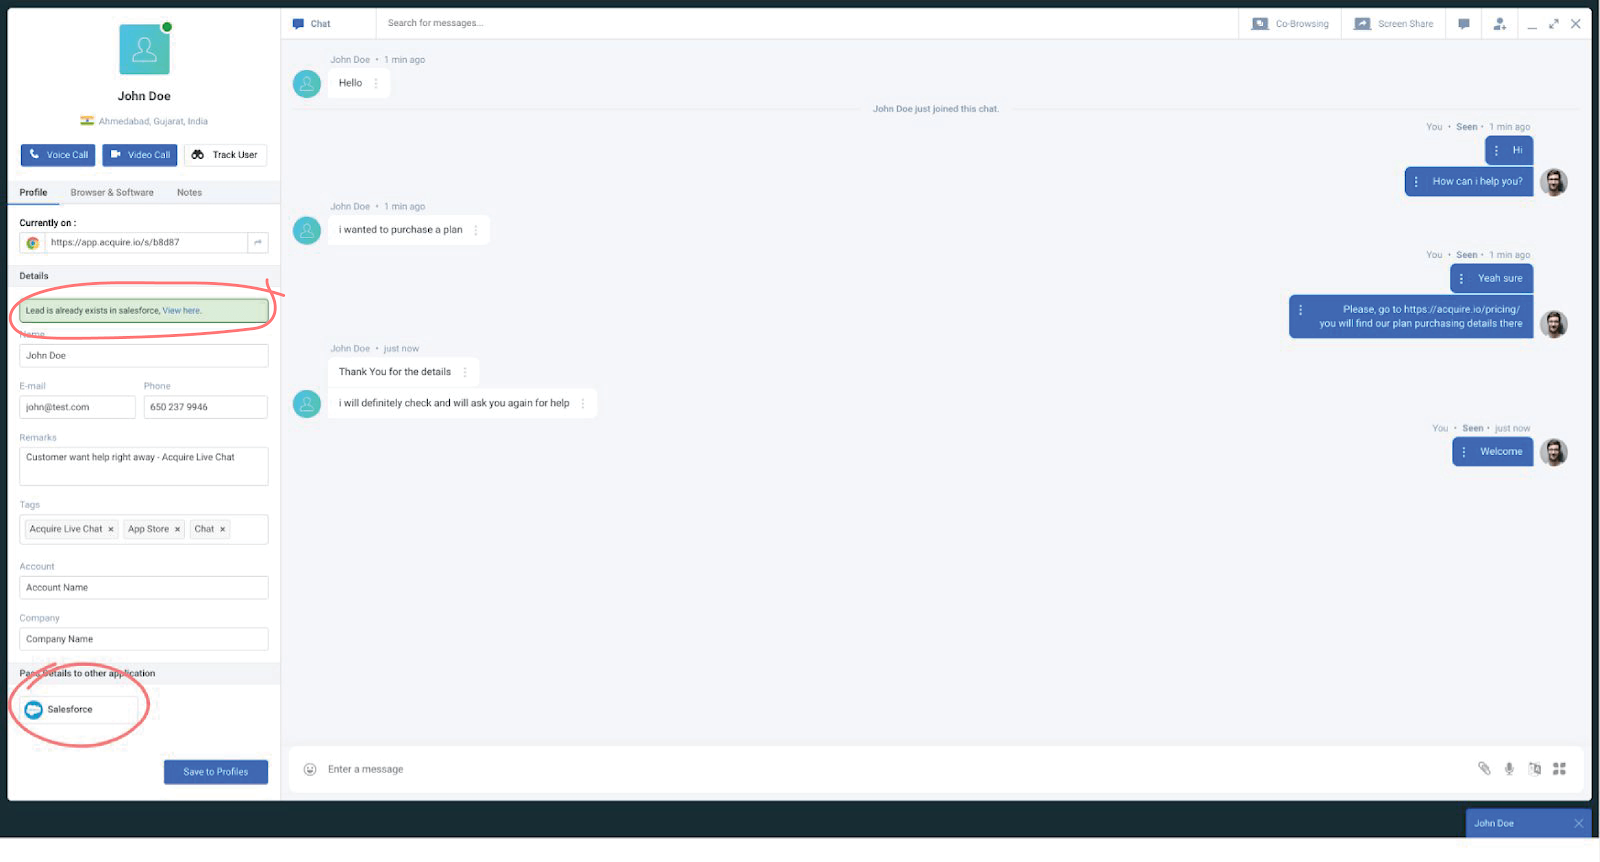
Visitor Exists - Check in Salesforce
If the visitor already exists in Salesforce, you see an alert in acquire profile section.
Step 4
Check your details into the Salesforce account to fetch your details, and chat transcript.

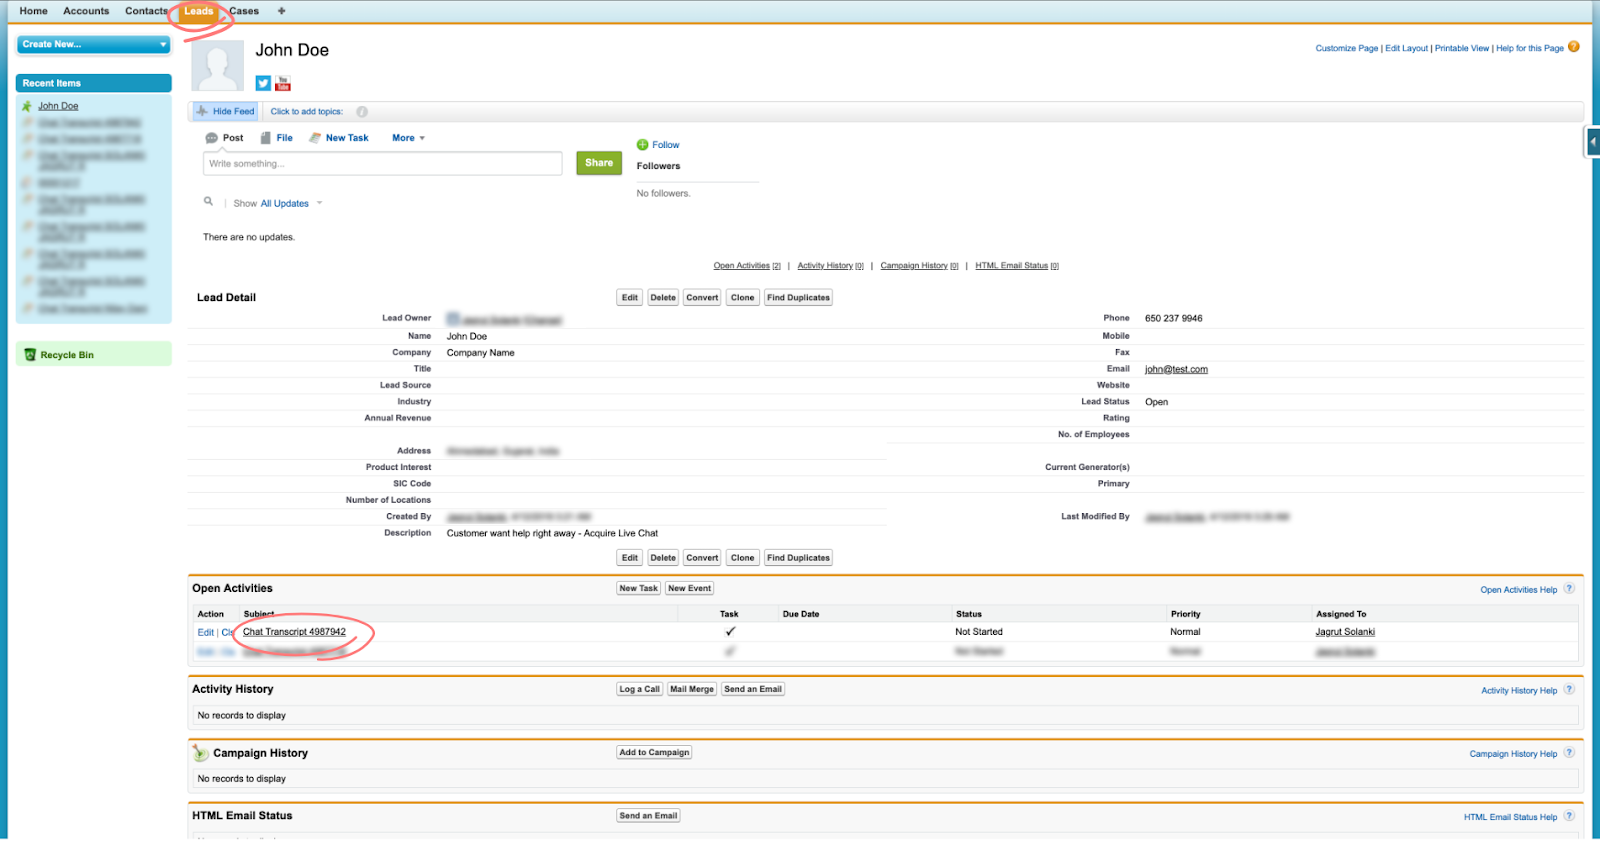
After successfully saving the script into your panel, you can start working with Acquire Live Chat.
Note: Error API_DISABLED_FOR_ORG will show up whenever we detect that the API is not enabled inside your Salesforce panel (i.e. Salesforce did not record your payment for API or when it’s manually disabled). For details on resolving it, we recommend contacting Salesforce directly.
If you have any questions or need help, come to Live Chat or email us at support@acquire.io.