Integrations
Salesforce SAML
Within Acquire you can use Salesforce SAML to login to your Acquire account.
Step 1. Setup Salesforce Identity Provider
- First setup Salesforce as an identity provider by following the official documentation.
- After enabling SF as an identity provider, download the certificate. For this tutorial, I used the default self-signed certificate provided by SF.
Step 2. Define a Connected App for Acquire Identity Server
- Go to setup and search for "App Manager" and select.
- Select ‘New Connected App’
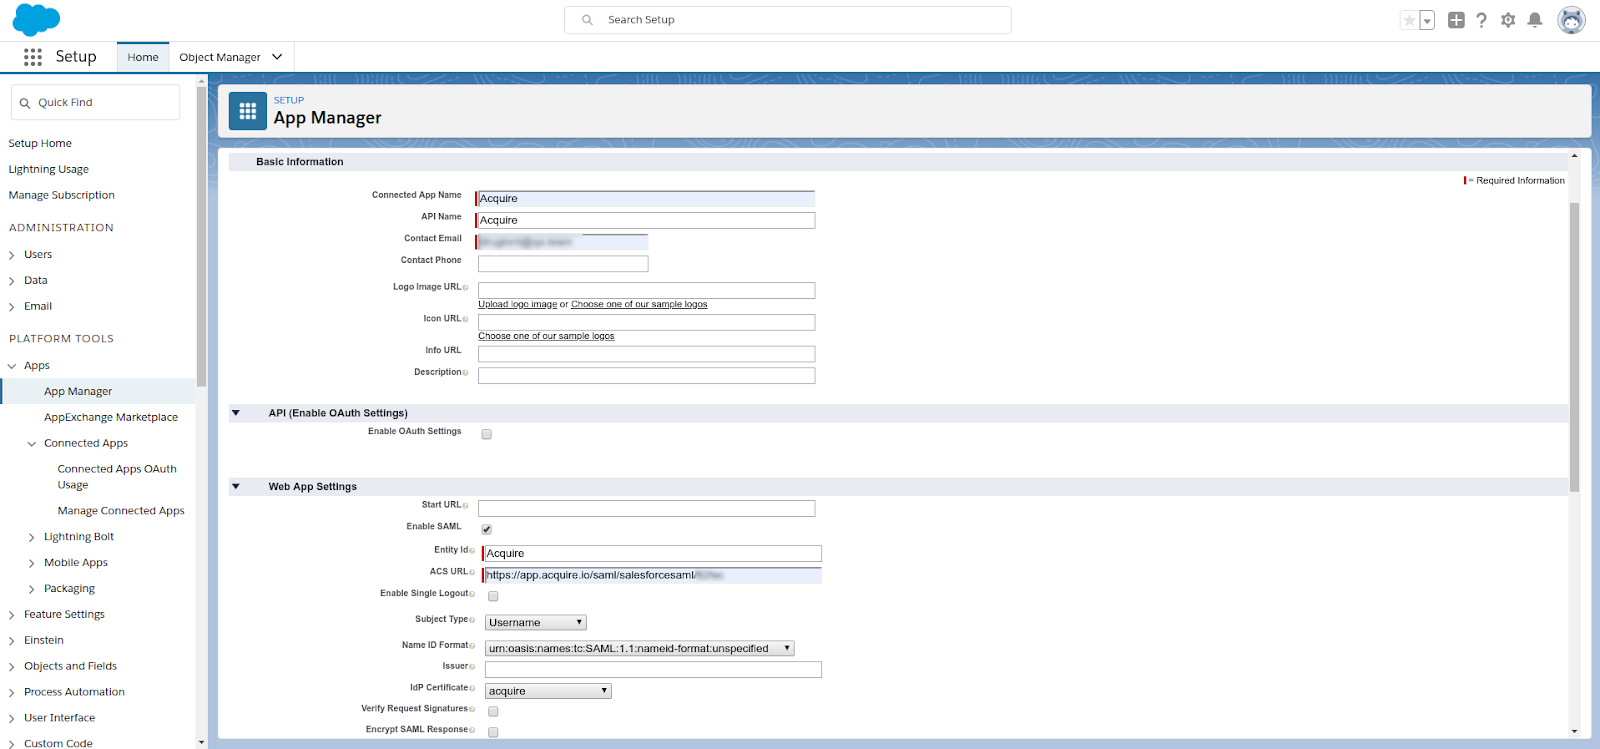
- Check "Enable SAML" in "Web App Settings" and Configure a connected app with the below details and save.
SAML Service Provider Settings:
- Entity Id: Acquire
- Subject Type: Username
- ACS URL: https://app.acquire.io/saml/salesforcesaml/{User Account ID}
- Name ID Format : urn:oasis:names:tc:SAML:1.1:nameid-format:unspecified
- Idp Certificate: select the self-signed cert from the drop down
- Issuer: use domain configured in step 1 (ex: https://acquire-sample.my.salesforce.com)
Now you have setup the idp and created a connected app for Acquire Identity.
- After creating the app, go to setup and search for “Manage Connected Apps” and select.
- Click on the "Acquire" app we created.
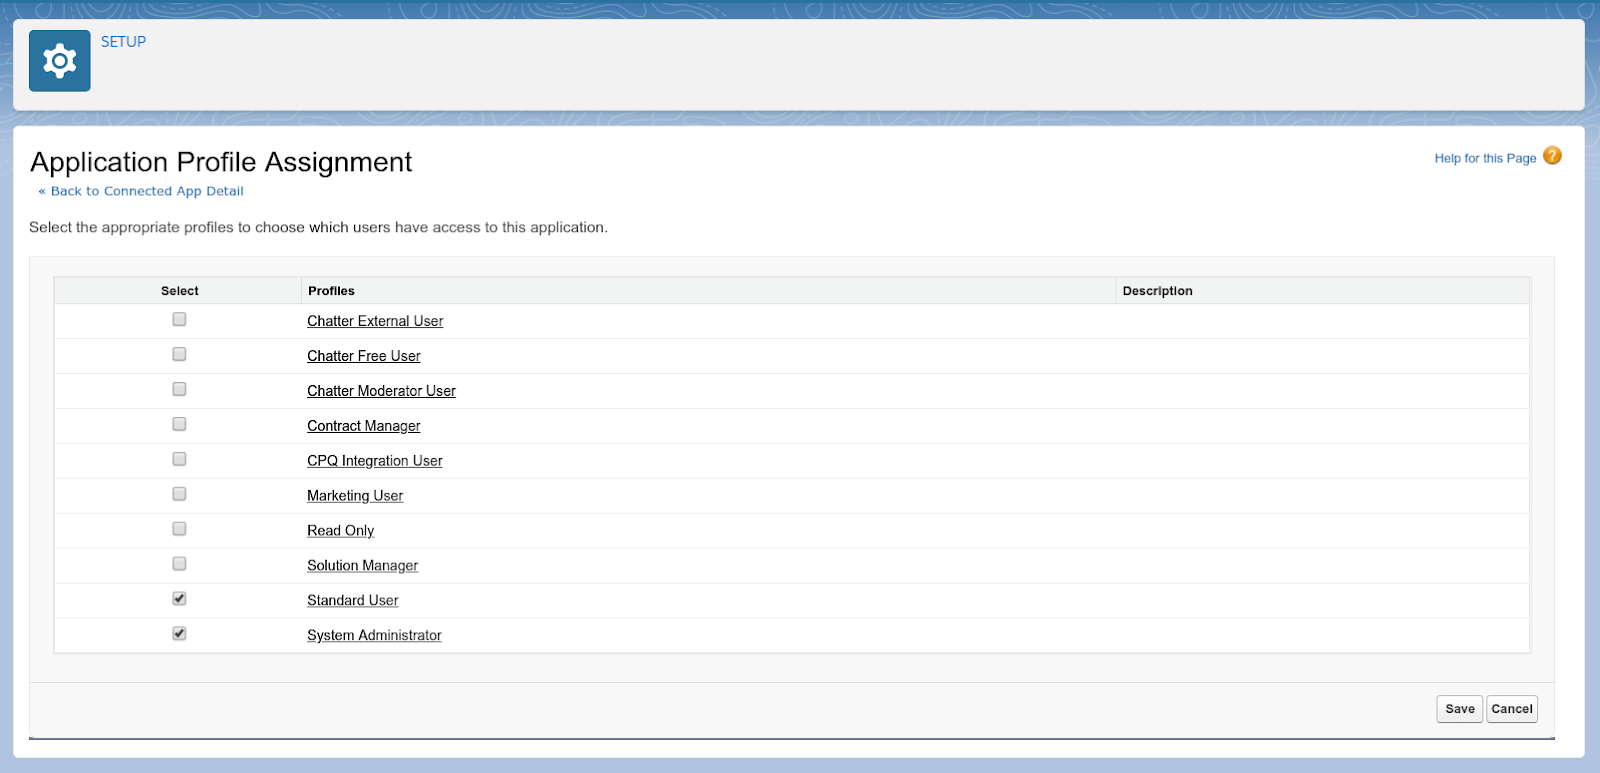
- Go to the "Profiles" section and click "Manage Profiles".
- Select Salesforce user profiles to restrict who can access the "Acquire" connected app.
Step 3. Add Role, FirstName, and LateName to the SAML Attribute Statement
The role of the authenticated user needs to be sent to Acquire for role-based authorization. Therefore, you have to add a role to the connected app as a custom attribute.
- Go to setup and search for “Manage Connected Apps” and select.
- Click on the "Acquire" app we created earlier.
- Go to “Custom Attributes” section and click on new.
- Provide “role” as attribute key and “ $UserRole.Name” as the attribute value and save.
- Provide “FirstName” as attribute key and “ $User.FirstName ” as the attribute value and save.
- Provide “LastName” as attribute key and “ $User.LastName ” as the attribute value and save.

Step 4. Enable Identity Provider
Go to setup and search for "Identity Provider" and select.

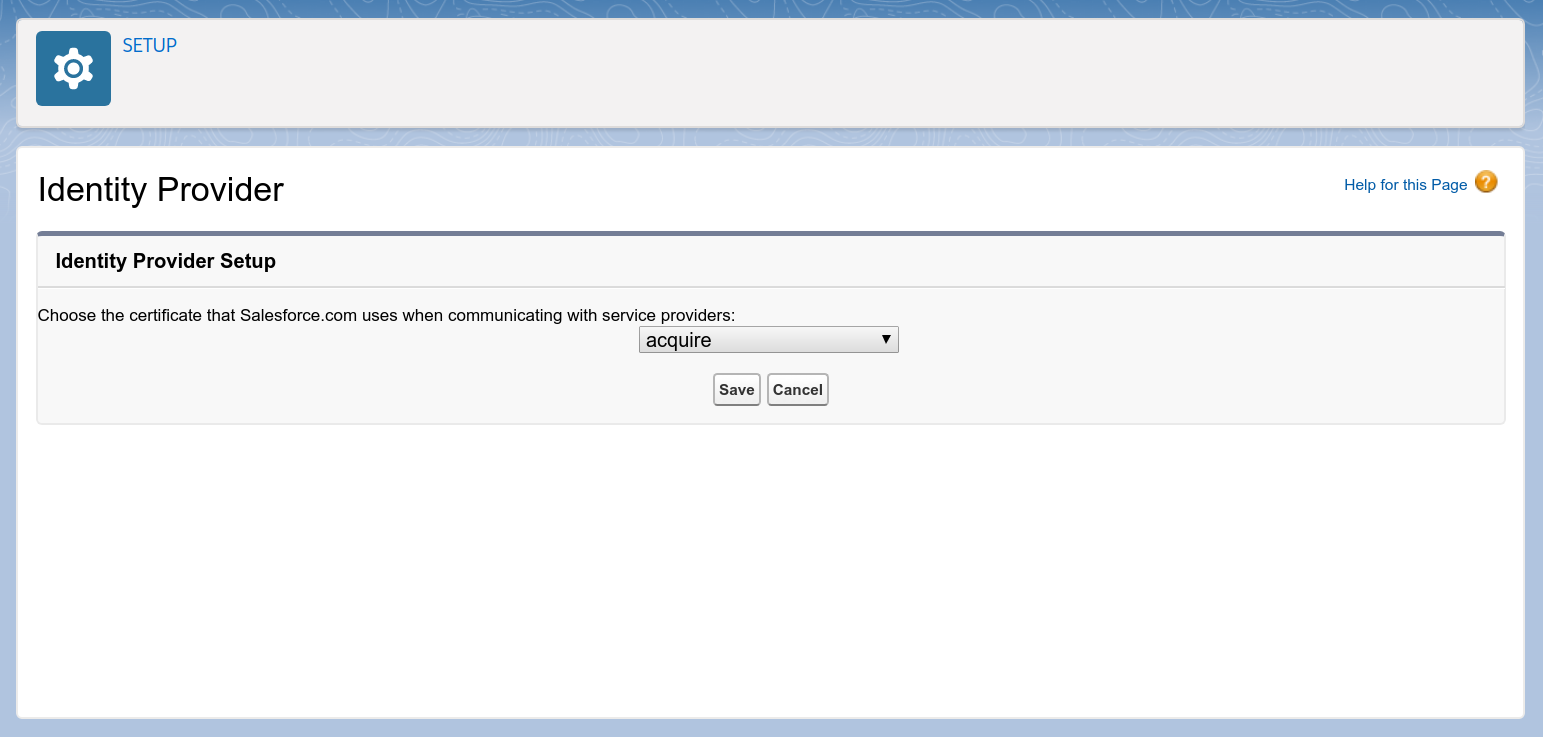
Click on “Enable Identity Provider” button.
Select your self-signed certificate and click Save.
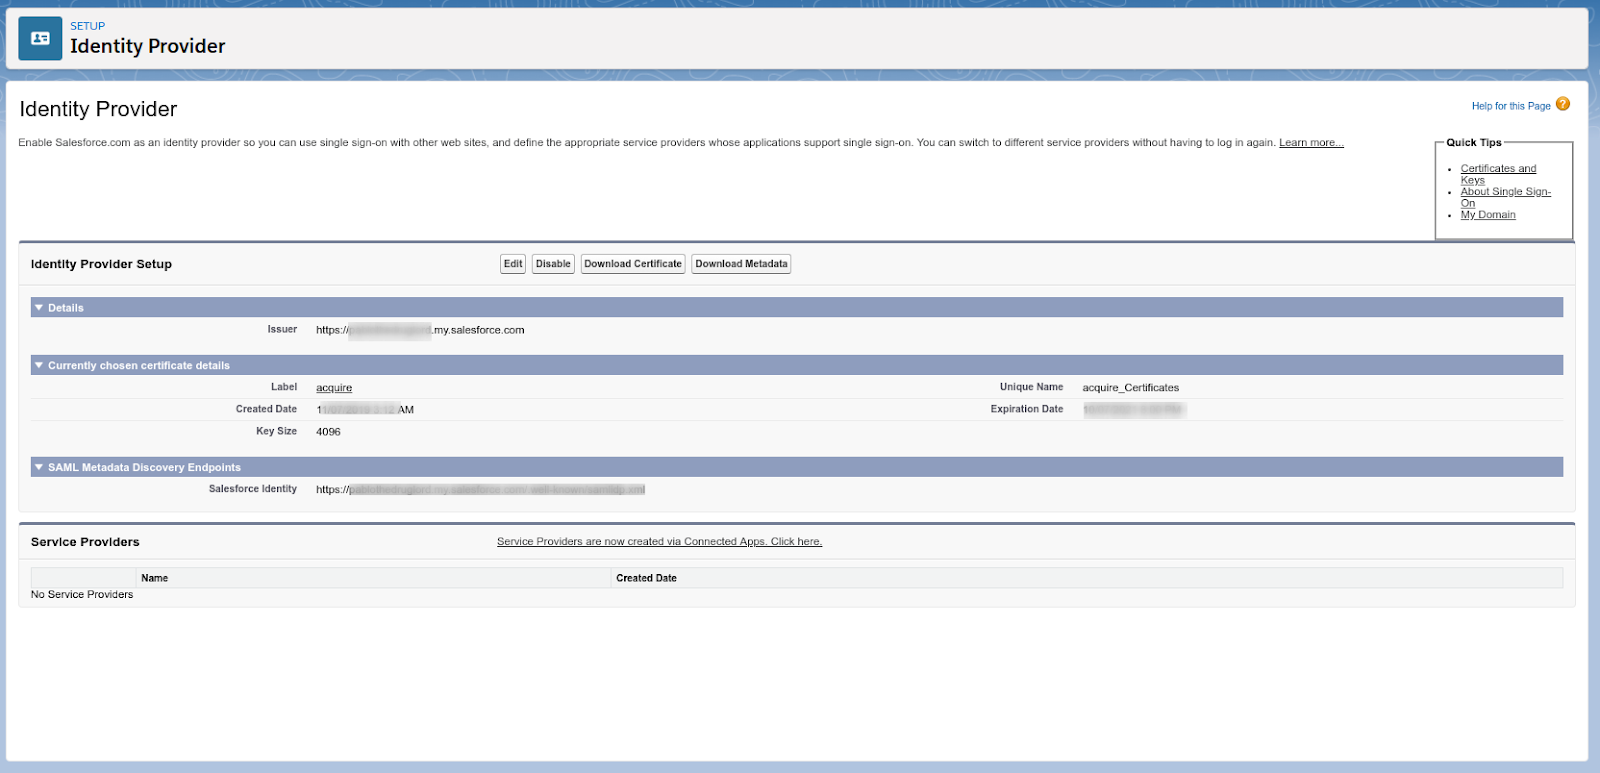
You should now see this screen. Click on Download Certificate.(need to paste in Acquire X.509 Certificate )
Step 5. Configure Salesforce - SAML to Acquire
- Go to setup and search for “Manage Connected Apps” and select.
- Click on the "Acquire" app we created earlier.
- Copy “IdP-Initiated Login URL” and paste
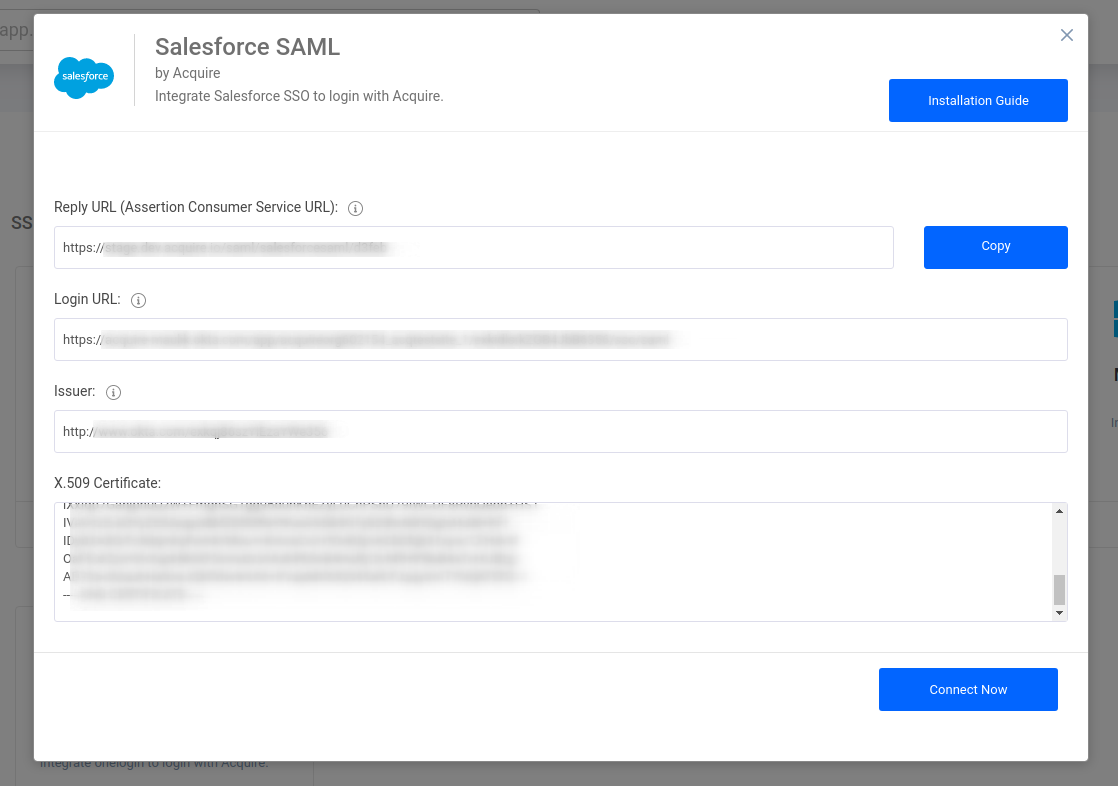
Basic Information
- IdP-Initiated Login URL: Login URL
- Issuer: Issuer
- Idp Certificate: Copy Download Certificate and Paste.
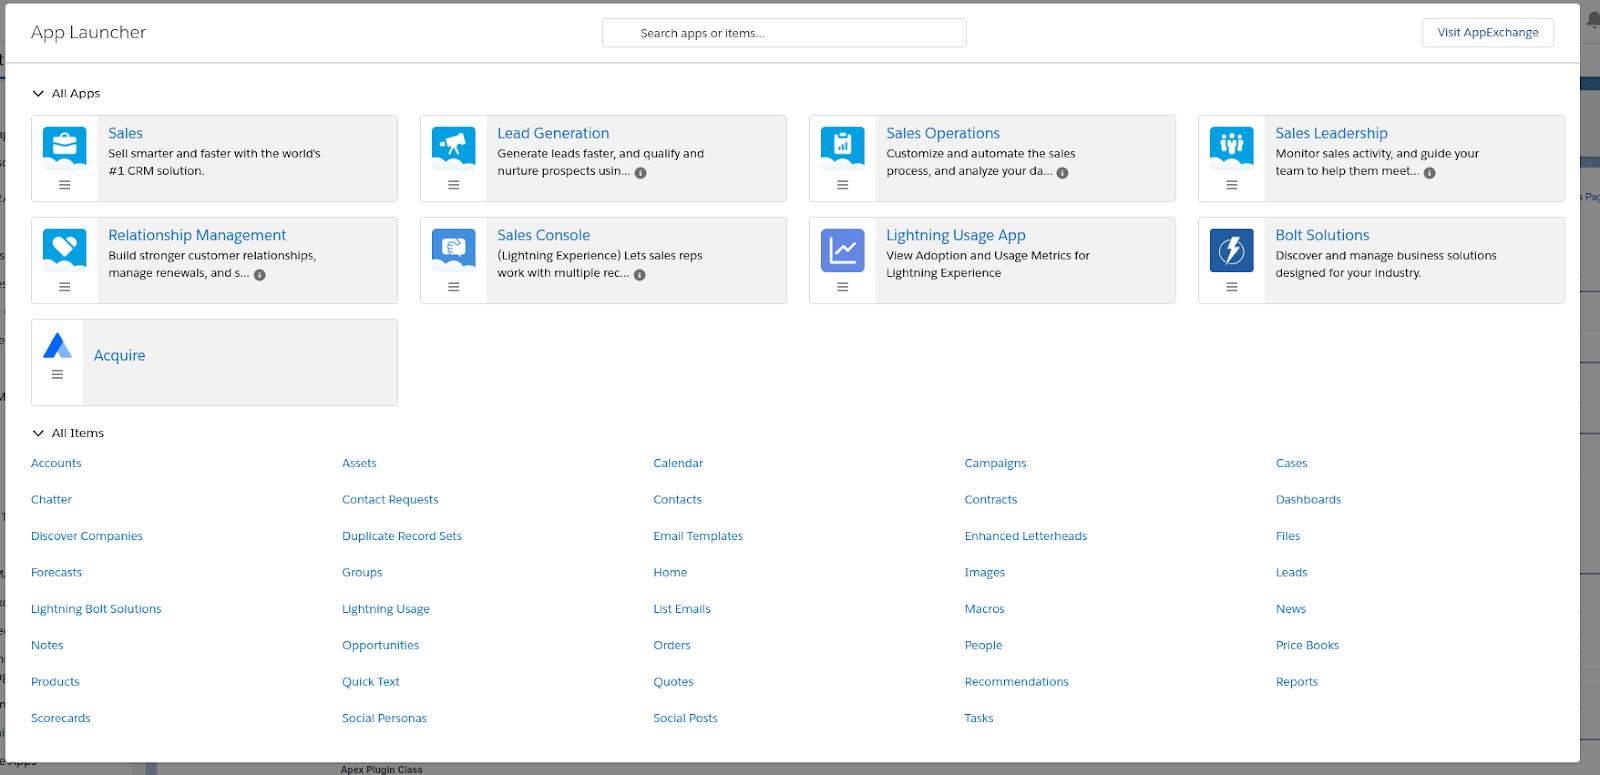
Step 6. Add an app in App Launcher
- Go to setup and search for “Manage Connected Apps” and select.
- Click on the "Acquire" app we created.
- Copy “IdP-Initiated Login URL”
- Click “Edit Policies”
- Paste “IdP-Initiated Login URL” in “Start URL” and save.
- You can see the “Acquire” app in App Launcher.

Now assign the app to the user and Salesforce can be used to log in to Acquire.
Testing
1. Go to your Salesforce App Launcher.
2. Find an Acquire Application that you created.
3. Click on that Application and you can directly log in to Acquire.
OR
1. Go to https://app.acquire.io/sso.
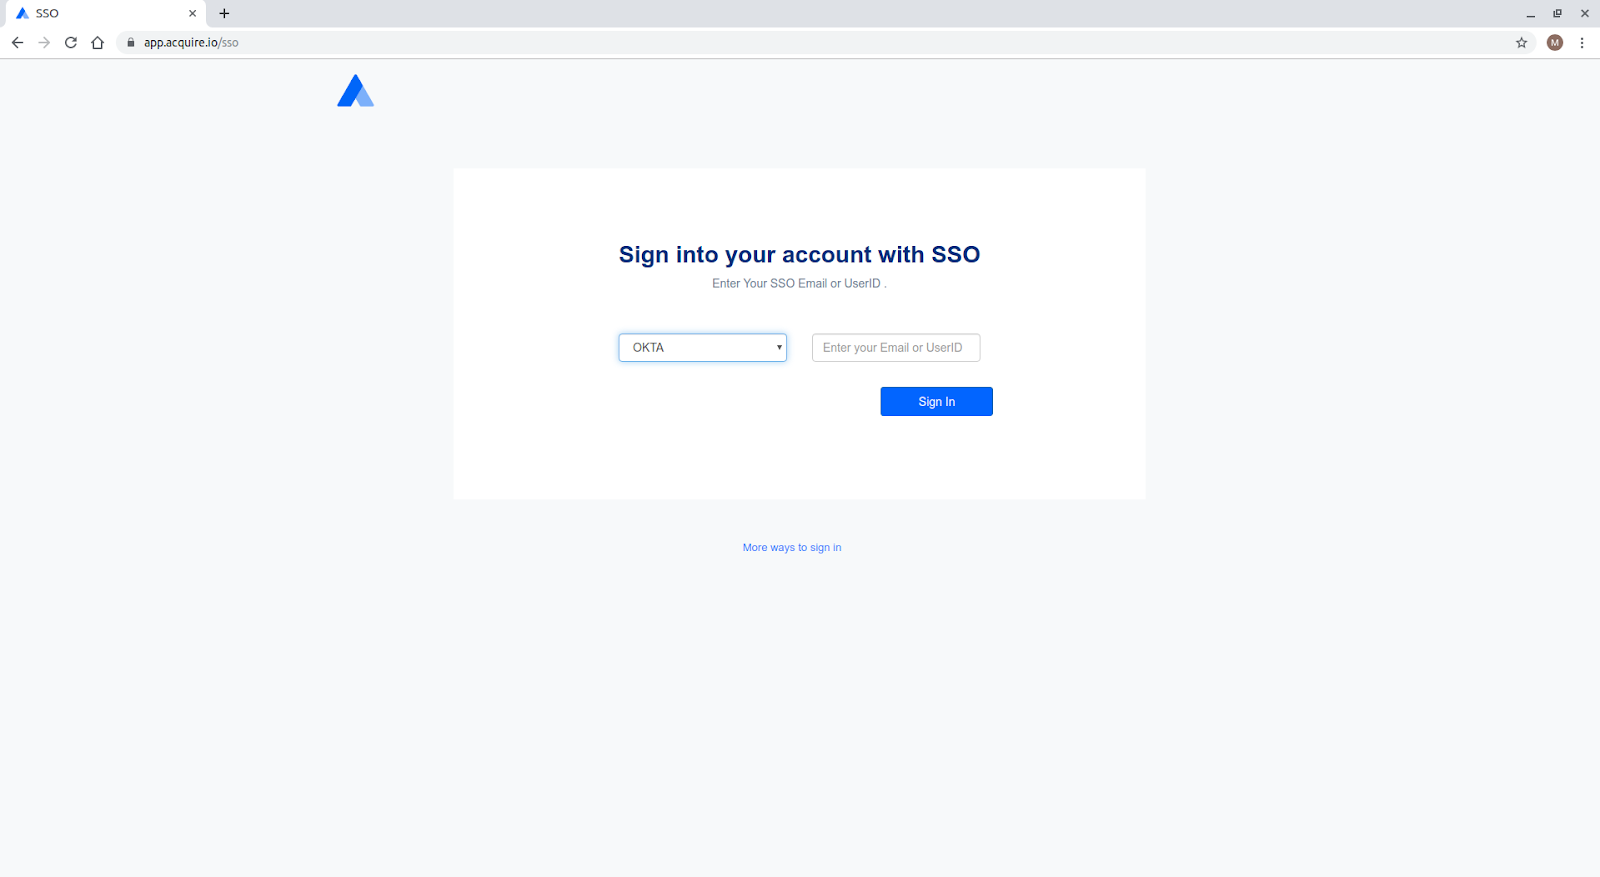
2. Select your Salesforce and enter your User Id or Email ID.
3. Click on Sign in button and you'll be redirected to a Salesforce sign in flow. You will log in with your Salesforce credentials, and then be redirected back to your Acquire dashboard.