Integrations
Skype
Skype is a telecommunications application that specializes in providing video chat and voice calls between computers, tablets, mobile devices, the Xbox One console, and smartwatches via the Internet. Skype also offers instant messaging services. Users may transmit text, video, audio, and images.
Setting Up Skype:
To set up skype, you need to have a Microsoft account.
Creating the App :
Go to Microsoft Azure to register a new app. This service needs to connect your Skype Bot to Acquire so that you can interact with your contacts.
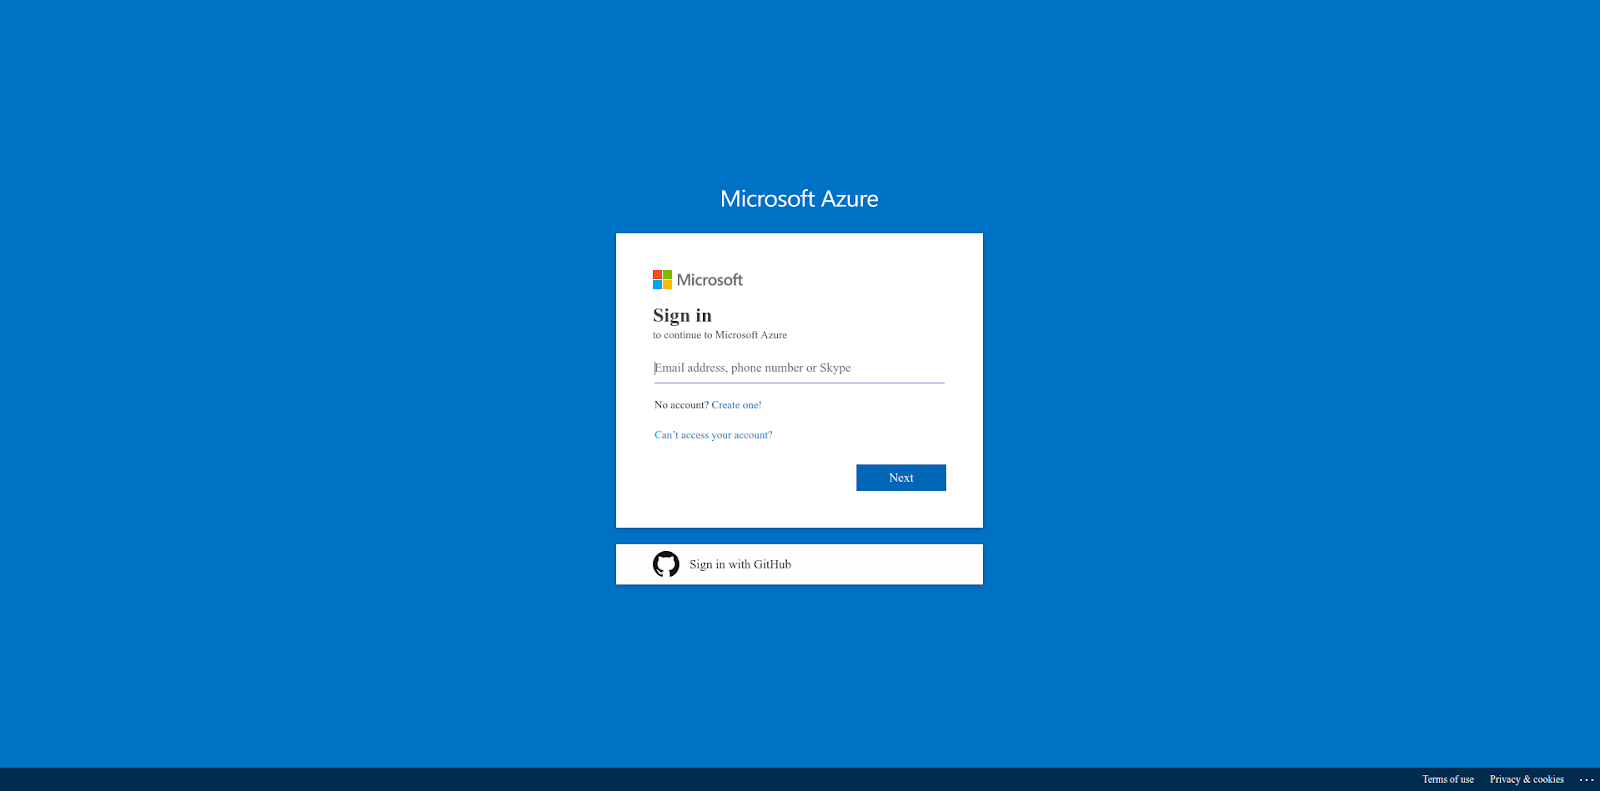
Log onto the Microsoft Azure Portal using your Microsoft account. After you have signed in, navigate to the App Registrations Page if you are not there already. You may have to use the search bar on the top of the platform to navigate there.
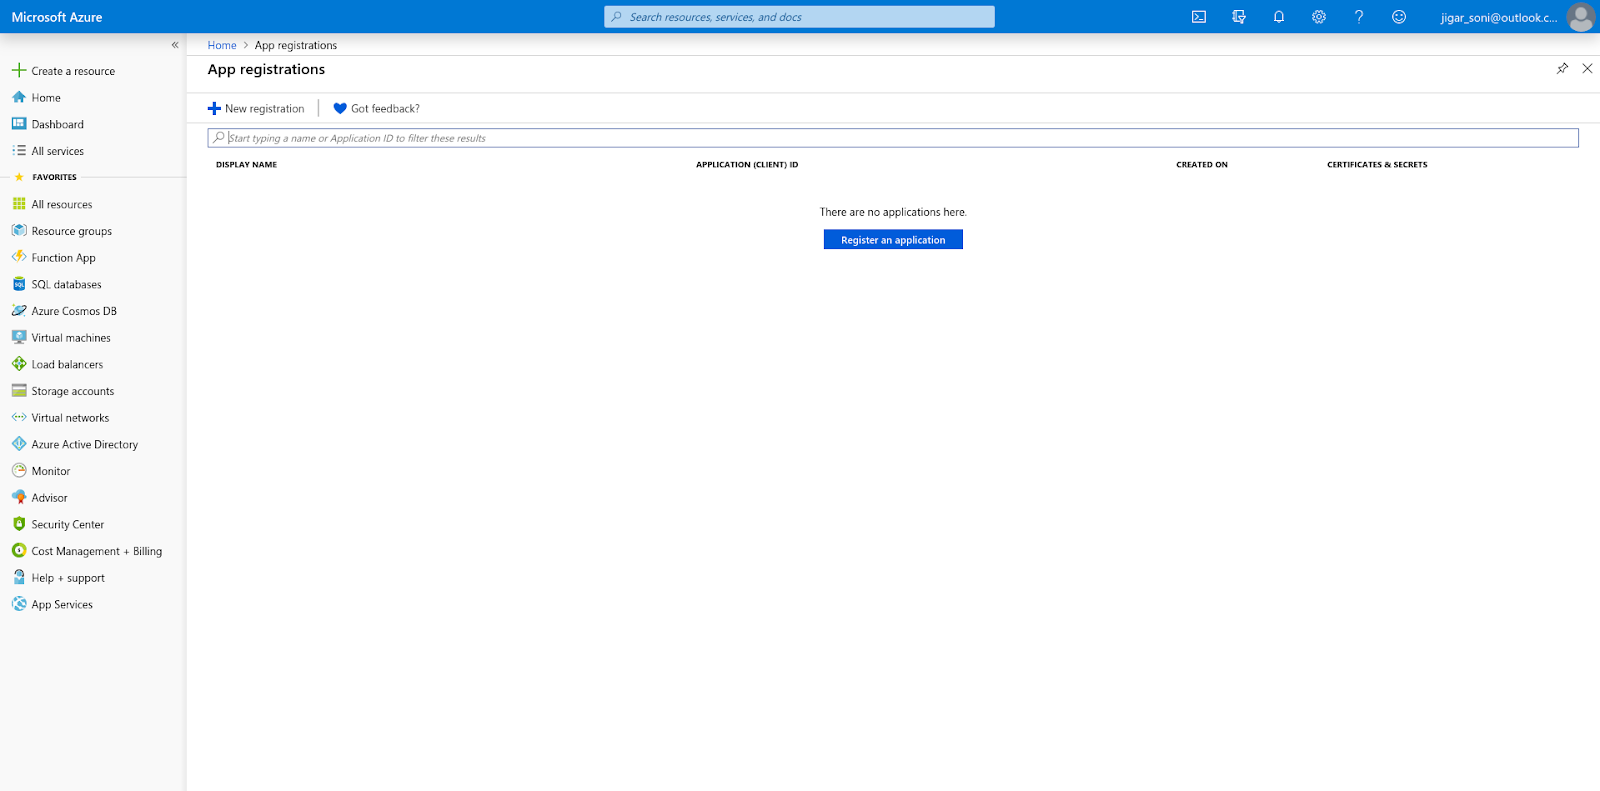
On the App Registrations Page, click on "New Registration" on the top left. This should take you to a form where you can register a new application.
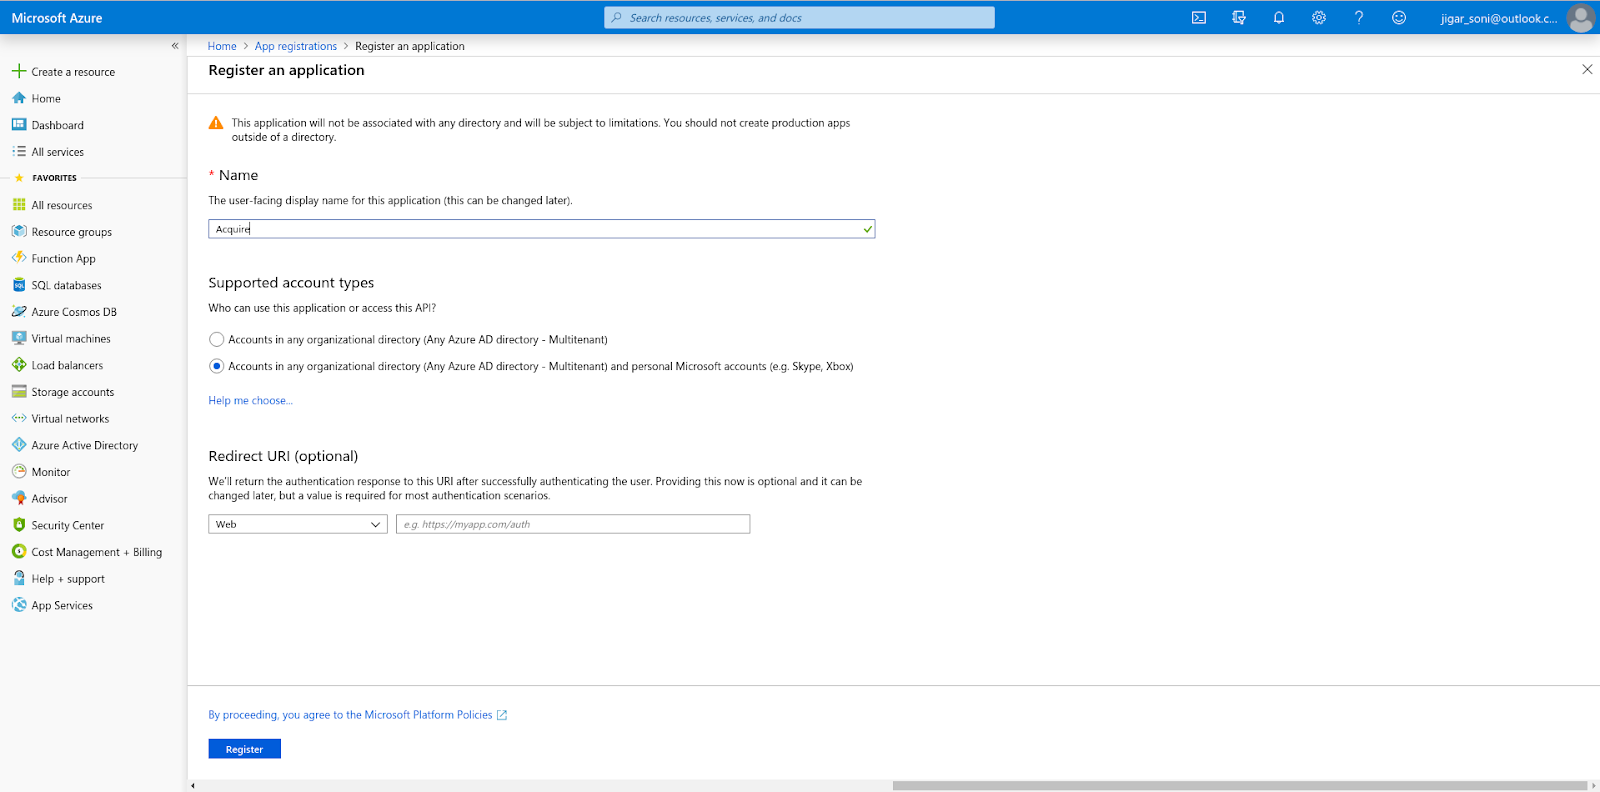
Here, enter a name for your new app under the "Name" section (e.g., "Acquire Skype"). This name will only be used internally for connecting your Skype Bot to Acquire.
For the "Supported Account Types" section, make sure "Accounts in any organizational directory (Any Azure AD directory - Multitenant) and personal Microsoft accounts (e.g., Skype, Xbox)" are selected.
Once you have done so, click "Register."
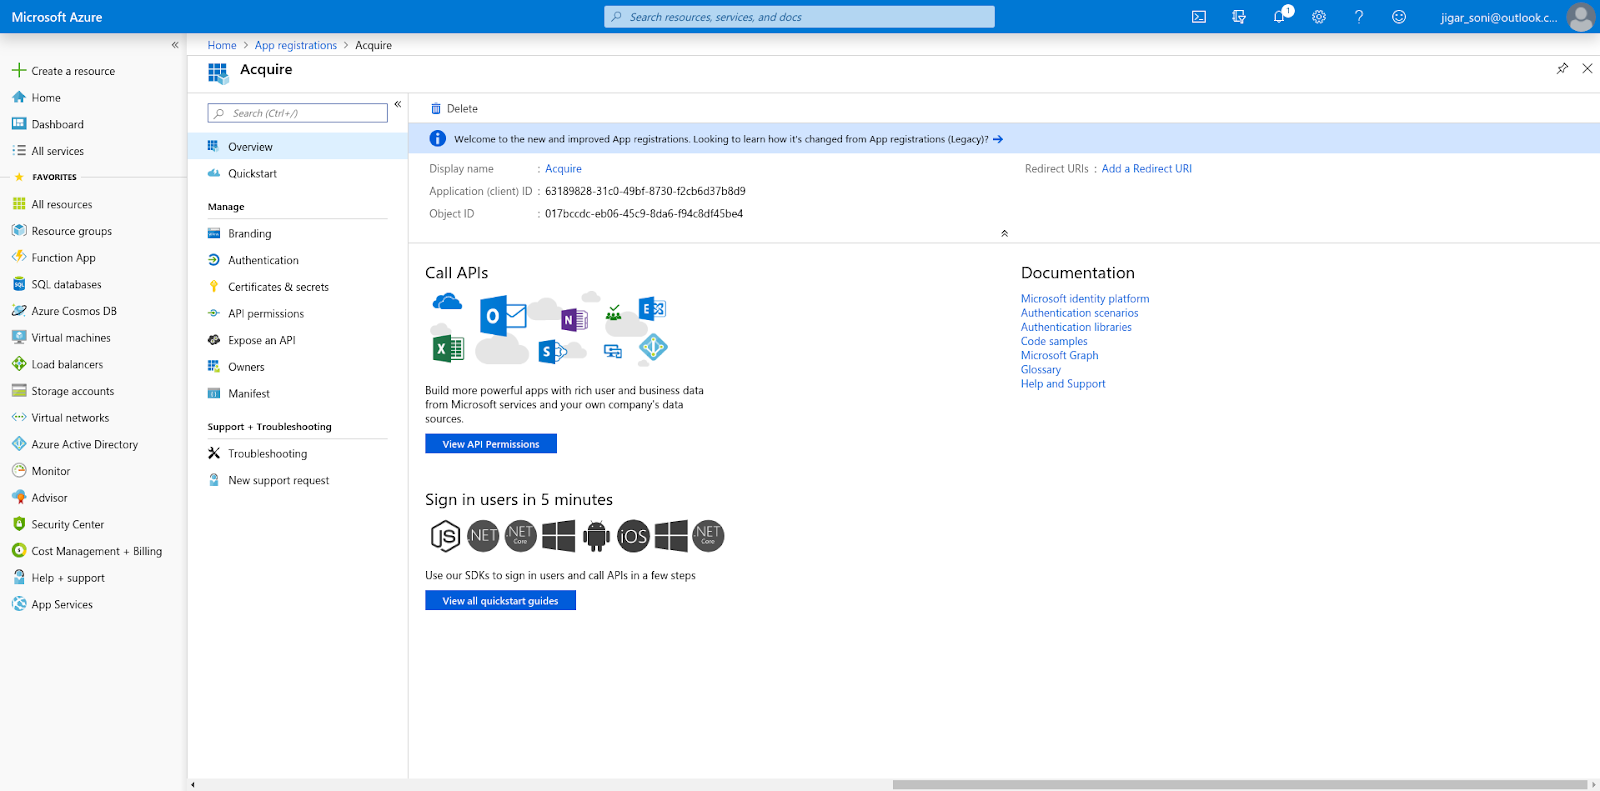
When your app has been created, you will be taken to the Overview page of your newly created app.
Creating the Bot:
You will have to create a new bot on Microsoft's Bot Framework Developer Portal. This service will allow you to host a shell of the Bot on Skype and allow its profile to be found by your contacts.
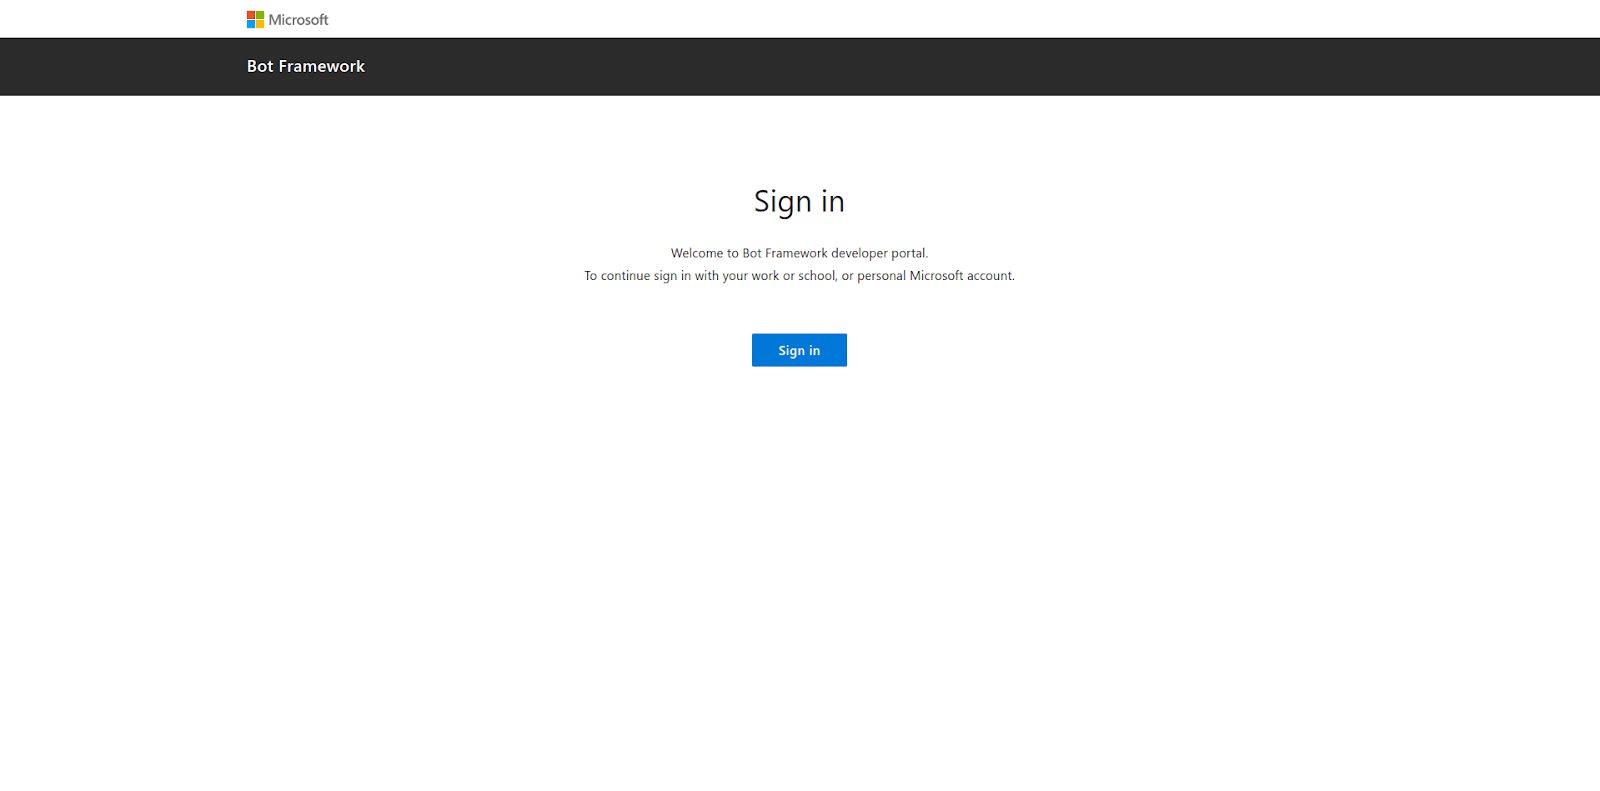
Sign in with your Microsoft account, and fill out the form to create your Bot.
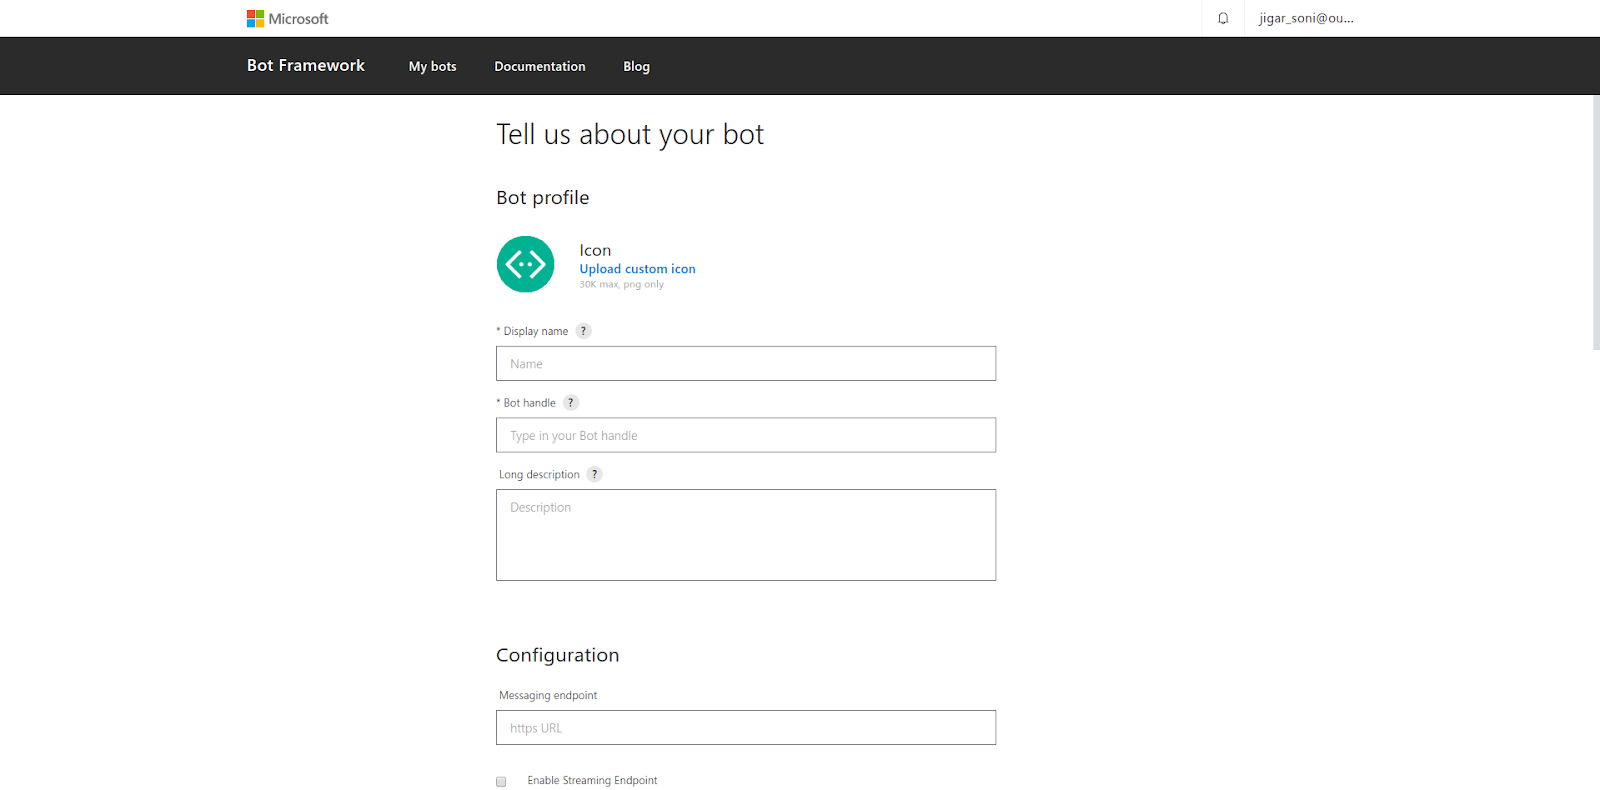
Bot Profile:
Give your Bot a name by entering it into the Display Name field. This will be the name that your contacts will see.
The Bot handle field will be used in the URL for your bot; as such, it has to be alphanumeric and underscores only.
Please Note: You cannot change this once the bot has been registered.
In the Description field, describe your bot. This will appear in channels or directories.
You can also upload a profile icon for your bot as you see fit.
Configuration:
In the "Configuration" section, there is a field that asks you to paste your Microsoft App ID; please make sure to input this.
Go Back on the Microsoft Azure Portal, navigate to the Overview Page of your app. You can access it through the App Registrations Page by selecting your app.

On the Overview page of your app, copy the "Application (client) ID" and paste it into the respective field on the Microsoft Bot Framework Developer Portal.
Leave the Messaging Endpoint field blank for now. Once you have filled out the required fields, agree to the terms of service at the bottom of the page and click "Register" to create your Bot.
Adding to Skype:
After creating your bot, you will have the option to connect your bot to different channels.
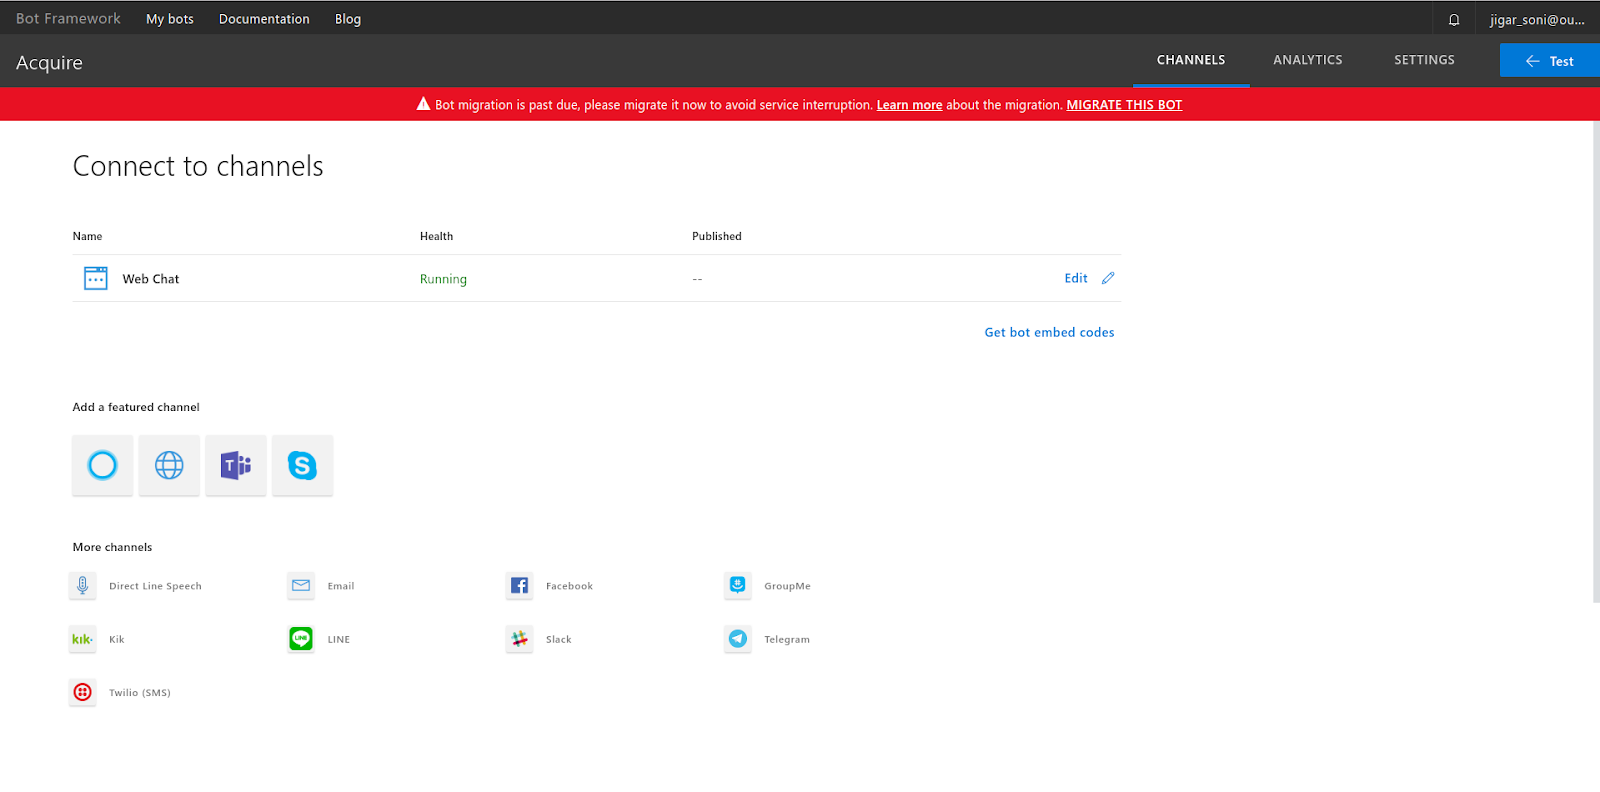
Under the "Add a featured channel" section, select the Skype Logo to activate the Skype channel.
Once you have done so, you will immediately be taken to the Configure Skype Page. Here, navigate to the "Messaging" tab.
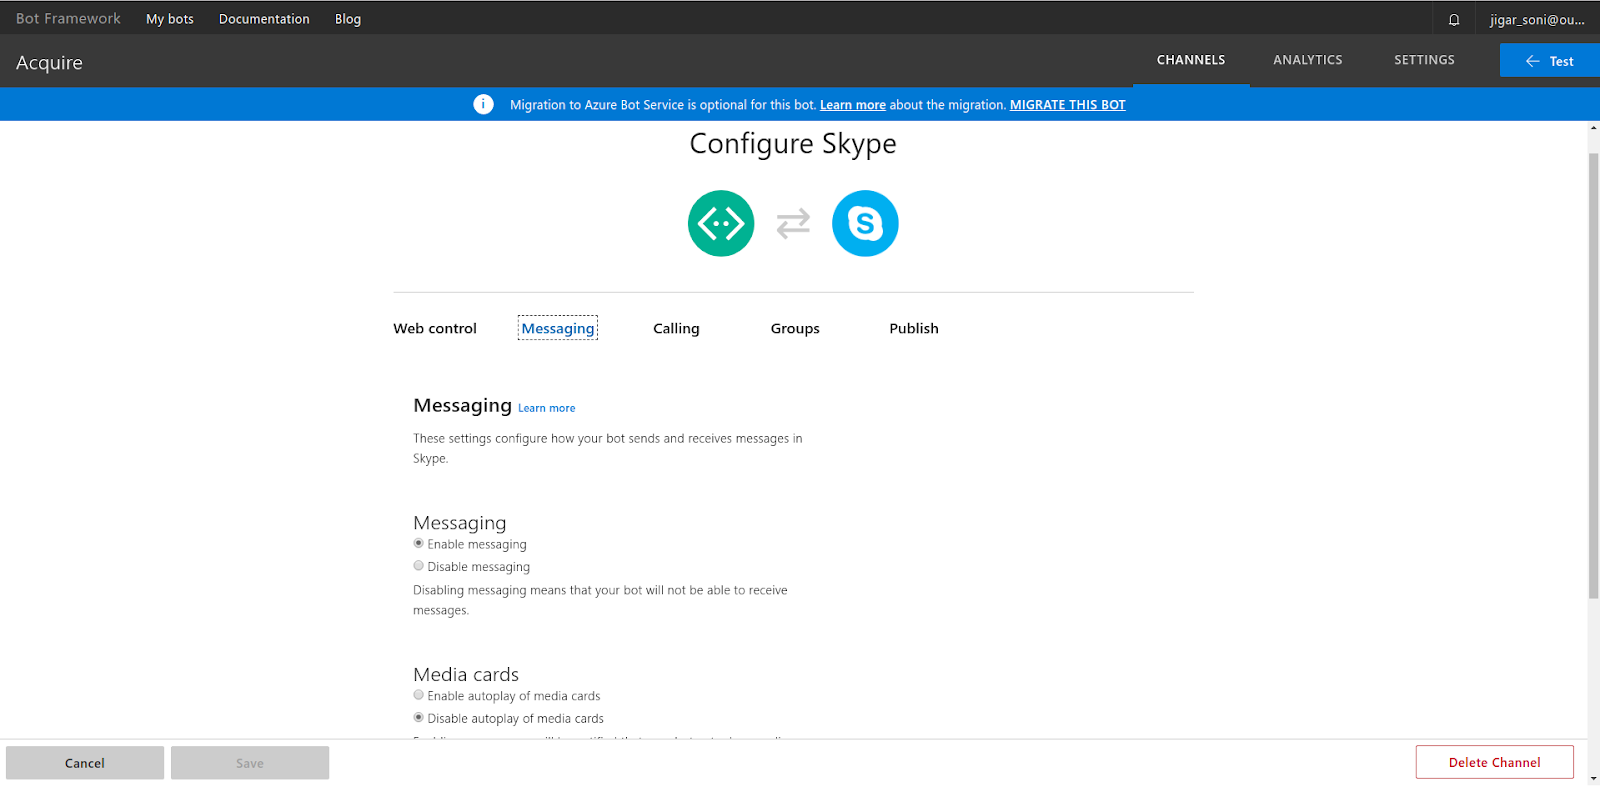
Make sure messaging is enabled Under the "Messaging" tab.
Connecting to Skype:
Under the Channel Connection menu, select the Skype logo and click "Next."
Once you have done so, you should be asked for the Channel Name, Greeting Message, and other information needed to connect your Skype account.
App ID:
Back on the Microsoft Azure Portal, navigate to the Overview Page of your app. You can access it through the App Registrations Page by selecting your app.

On the Overview page of your app, copy the "Application (client) ID" and paste it in the App ID field on the Acquire.
App Password:
Back on the Microsoft Azure Portal, navigate to the "Certificates & Secrets" tab using the sidebar under your App.
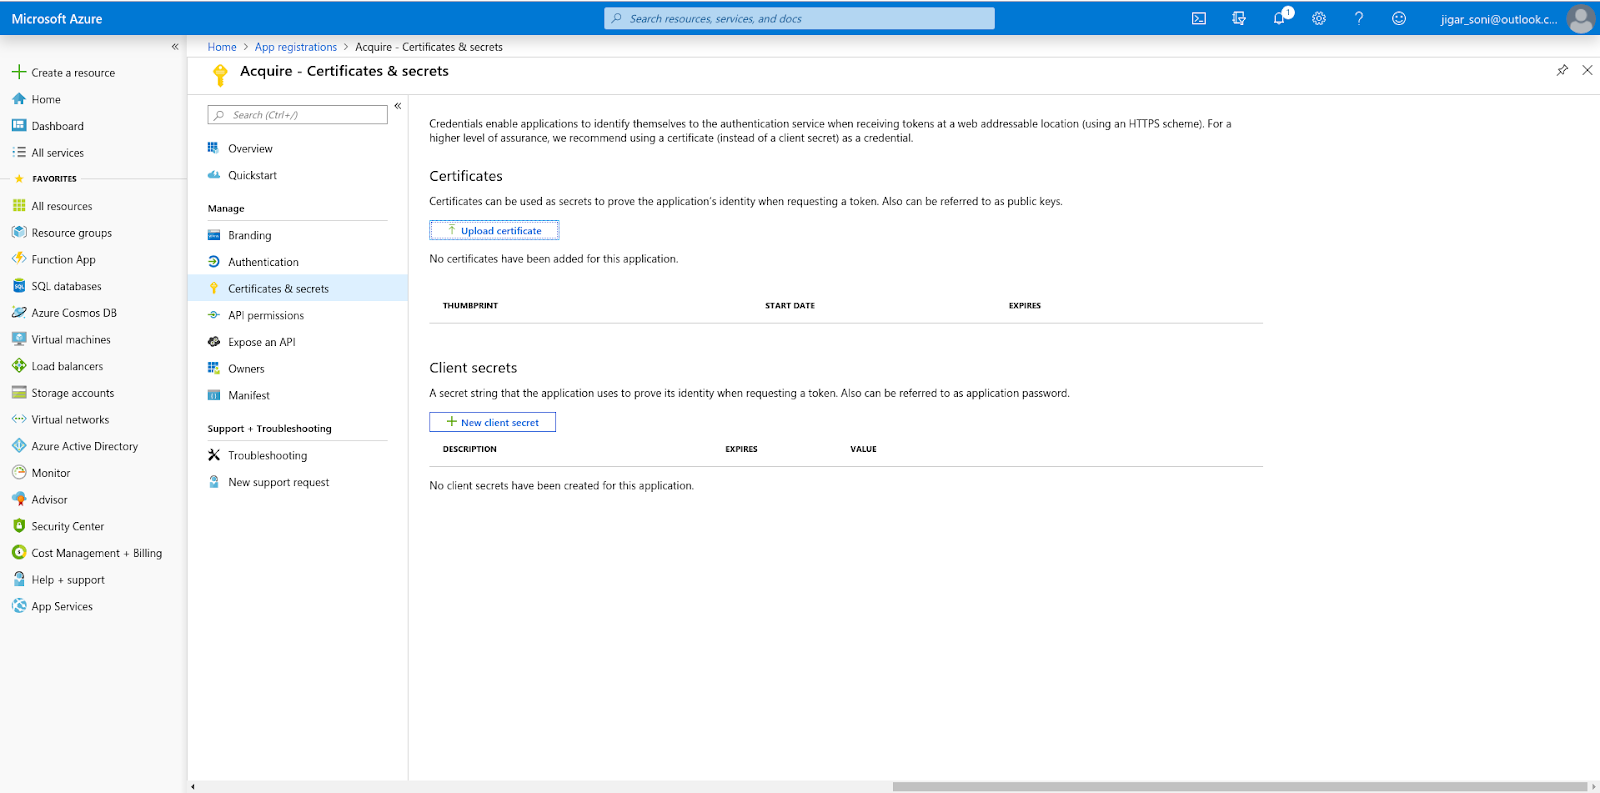
Under the "Client Secrets" section, press the "New client secret" button.

In the New Client Secret Prompt, select "Never" for the expiry date. Then click "Add" to create the new Client Secret.
On the "Certificates & Secrets" tab, copy the value of the newly added Client Secret and paste it in the App Password field on the Acquire Platform.
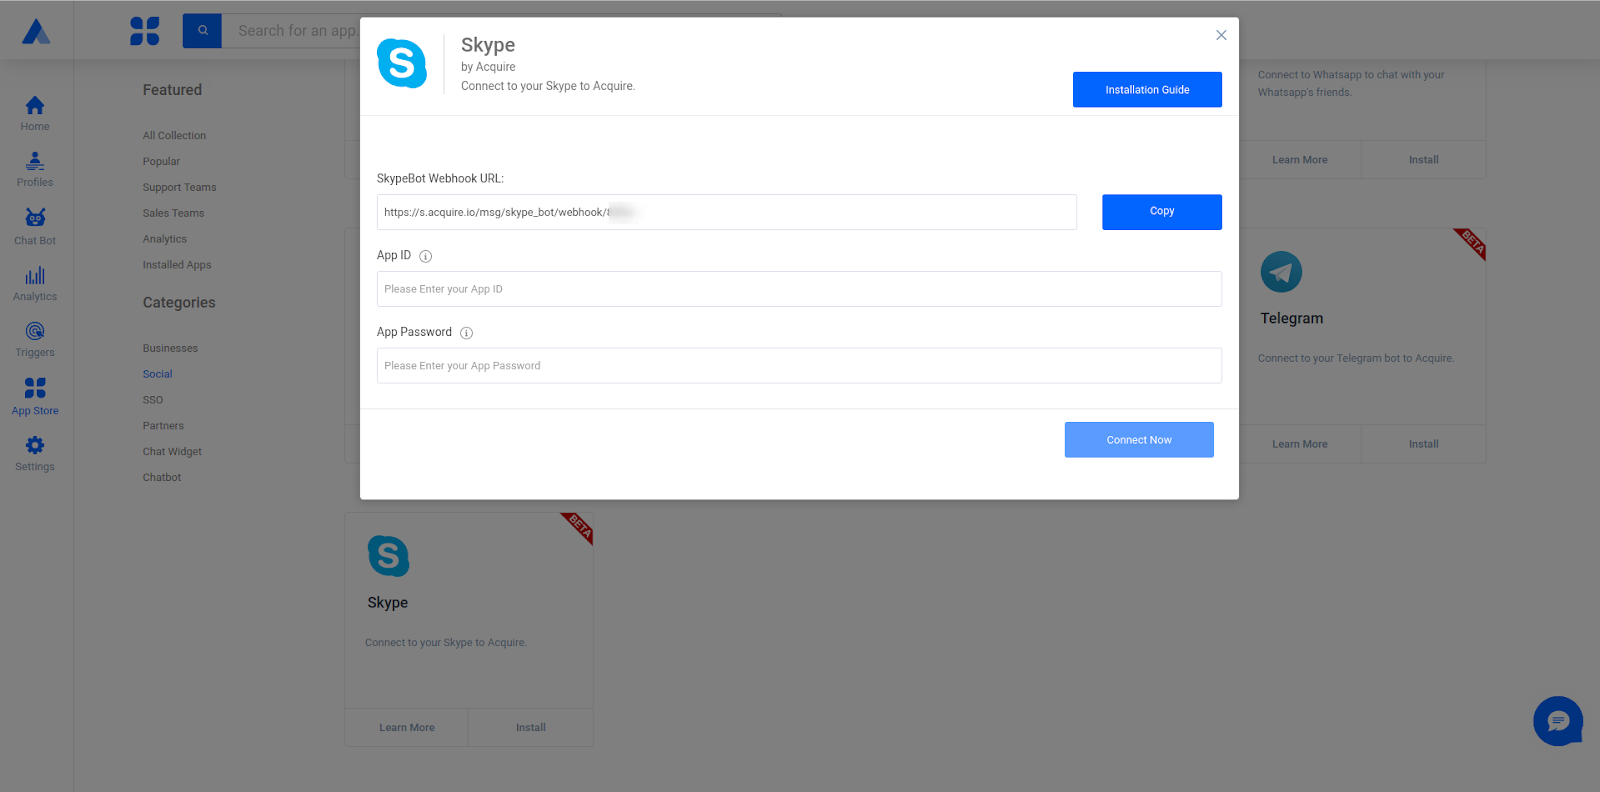
Connecting to the Platform
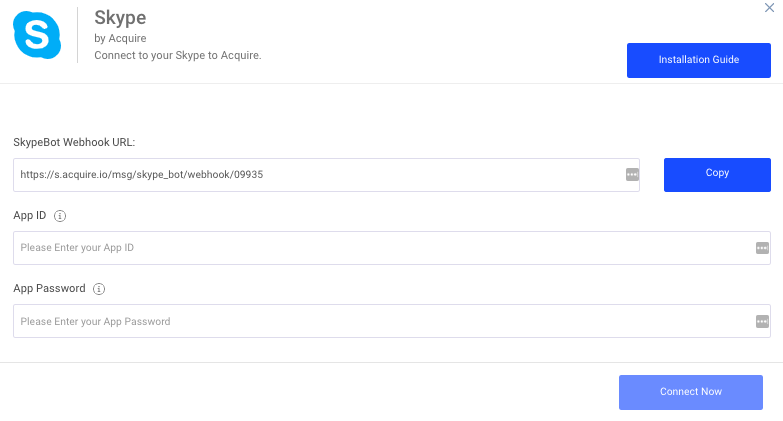
Once you have filled in the fields on the Acquire Platform, you will have to paste the Webhook URL into your Skype Bot.
Back on the Microsoft Bot Framework Developer Portal, navigate to your bot and select the "Settings" tab on the top right of the page.

Scroll down to the "Configuration" section. Copy and paste the Webhook URL from the Platform into the Messaging Endpoint field on the Microsoft Bot Framework Developer Portal.
Scroll down to the bottom of the page and click "Save changes" to update your bot settings.
Return to the Acquire Platform and click "Connect Now." Your Space will now be connected to Skype!
Now any messages sent to your Skype Bot will be received in Acquire.
Note that the Microsoft Azure servers can be painfully slow. You may have to wait upwards of 1 hour after completing the setup process before the Skype Bot is fully connected to the platform.
Testing on Skype:
Go to the Microsoft Bot Framework Developer Portal, navigate to your bot and select the "Channels" tab.
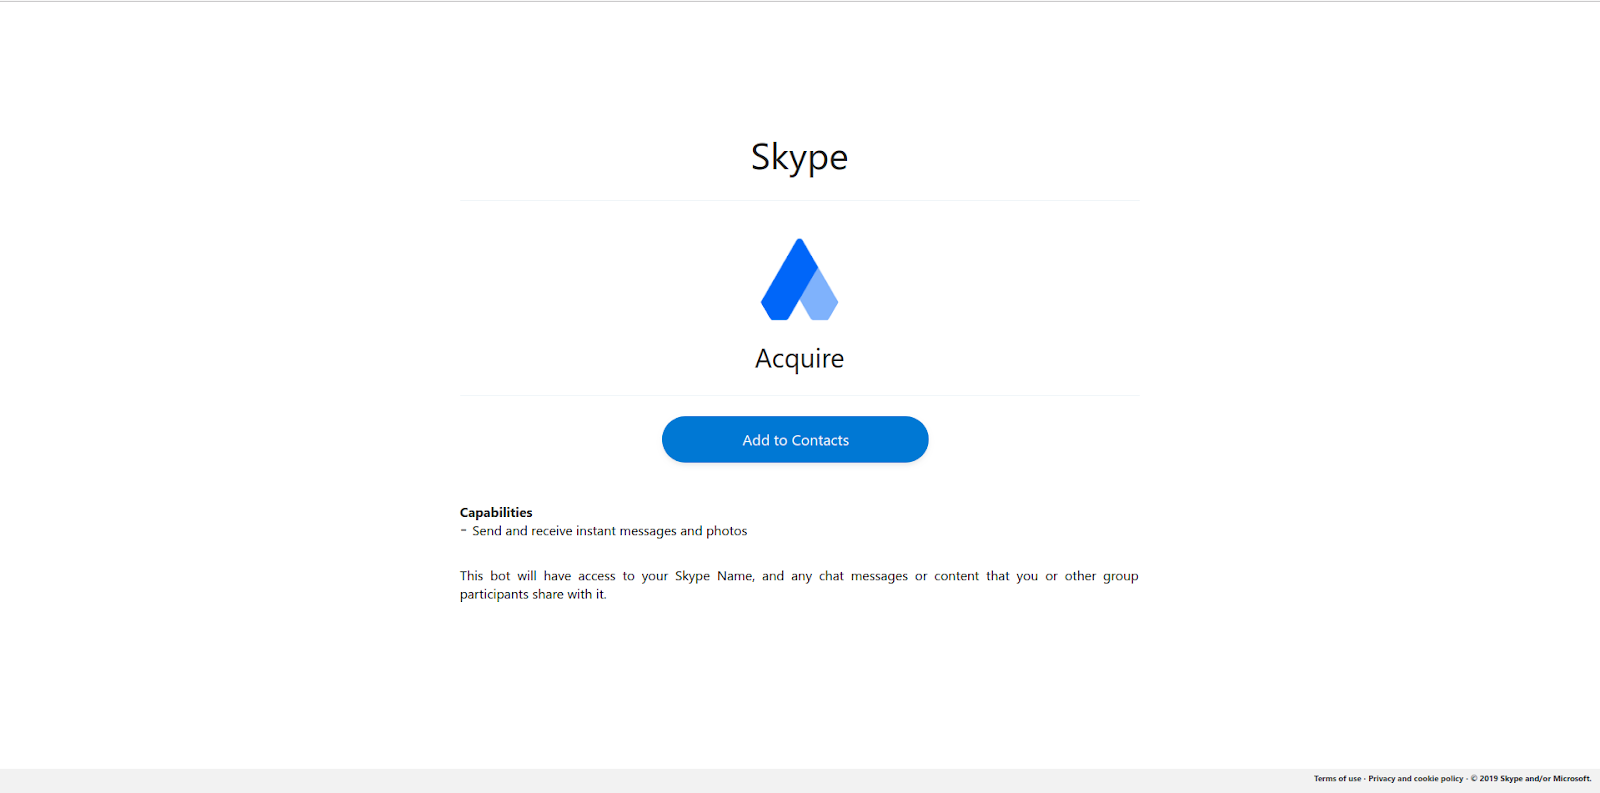
Under the list of connected channels, click "Skype" to open a webpage. Here you can add the Bot to your contact list on Skype.
Getting a Join Link:
While your Skype bot is still in Preview, it will not be publicly searchable. However, you still can distribute a join link for people to connect with your Skype Bot.
On the Channels tab of the Microsoft Bot Framework Developer Portal, right-click on Skype and copy the link address.

Anyone who follows this URL will be taken to the webpage where they can add your Bot to their Skype contact list.
Note that Microsoft limits Skype Bots in Preview to only 100 contacts. You will need to publish your Skype Bot to exceed this limit.
Publishing on Skype:
Bots in Preview are limited to 100 contacts by Skype and cannot be found when searched on Skype. By officially publishing your Bot, your bot will be searchable on Skype. You will also be able to connect with an unlimited number of users on Skype.
To officially publish your Skype Bot for public use, you will have to submit the Bot for Review.
Navigate to the Microsoft Bot Framework Developer Portal. Under the Channels tab, press the blue "Edit" for Skype. This will take you to the Skype Configuration page. Here, select the "Publish" tab.
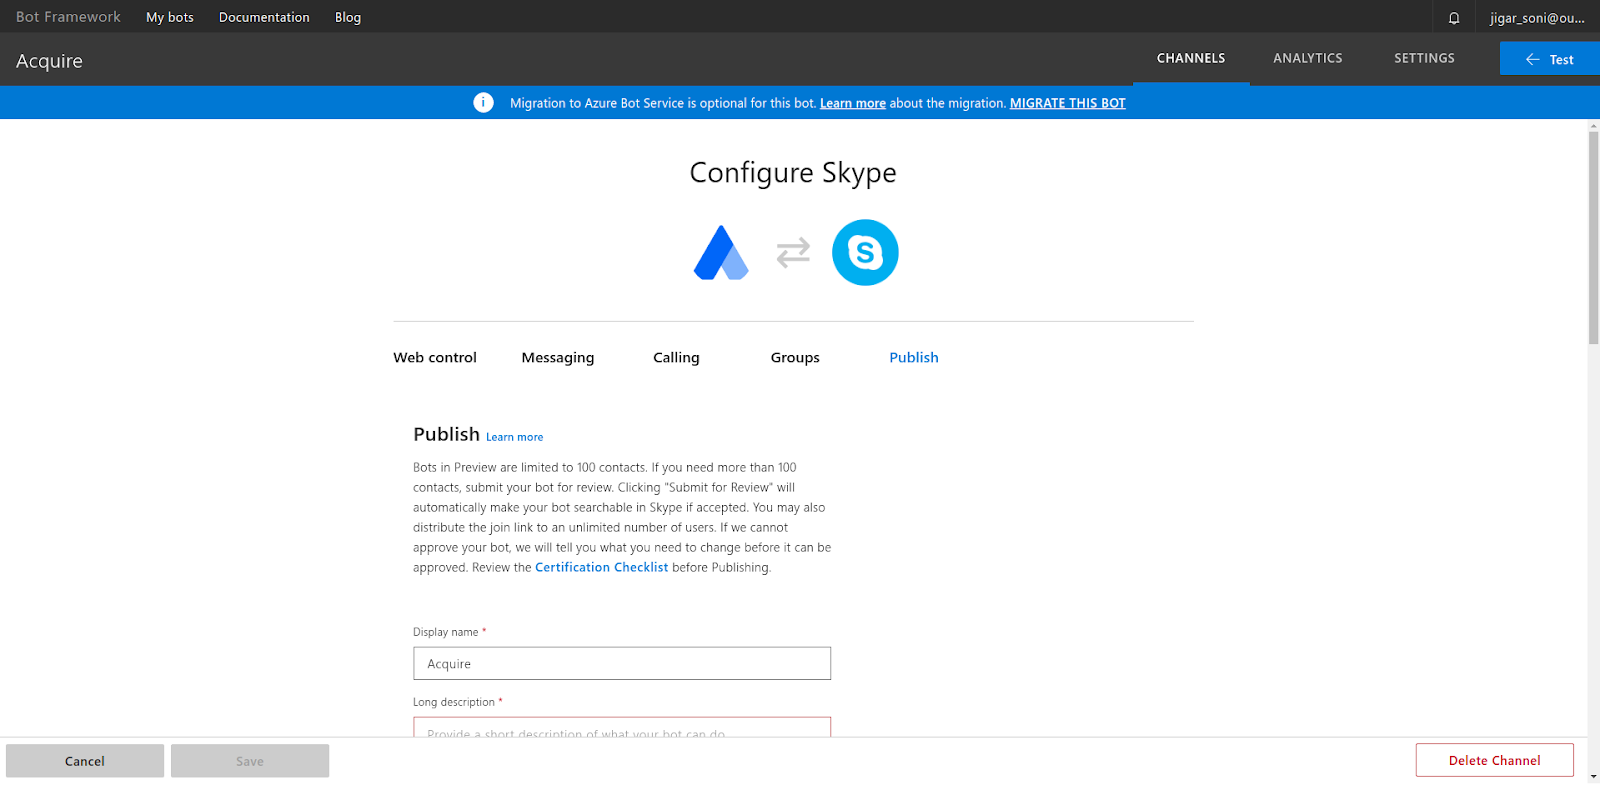
Under the Publish tab, you will have to fill out a form about your Bot and your information. Once you have filled in the required fields, press the blue "Submit for Review" button at the bottom.
Skype will now look over your Bot to see if it meets their requirements. If they cannot approve your Bot, they will tell you what you need to change before it can be accepted.
Note: Once Skype has approved your Bot, contacts can find your Bot by searching for its Display Name on Skype and you will be able to have an unlimited number of Skype contacts.
Note: The Skype review process can take upwards of one week.
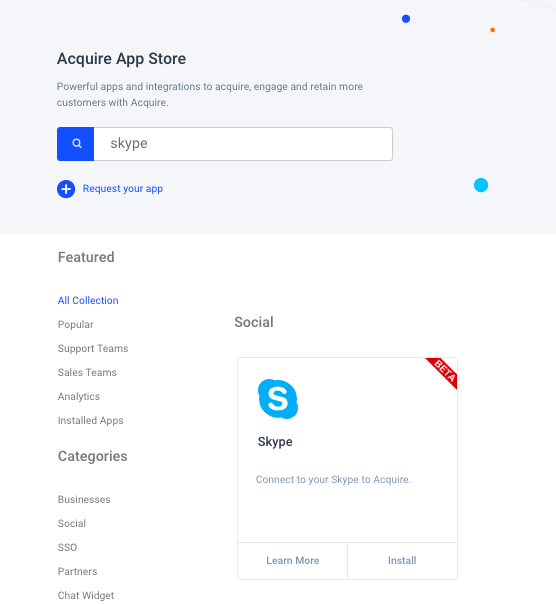
Once this occurs, make sure to Install the Skype App in the App store.
Make sure to input the SkypeBot webhook URL, App ID, and App password and finally click Connect Now.
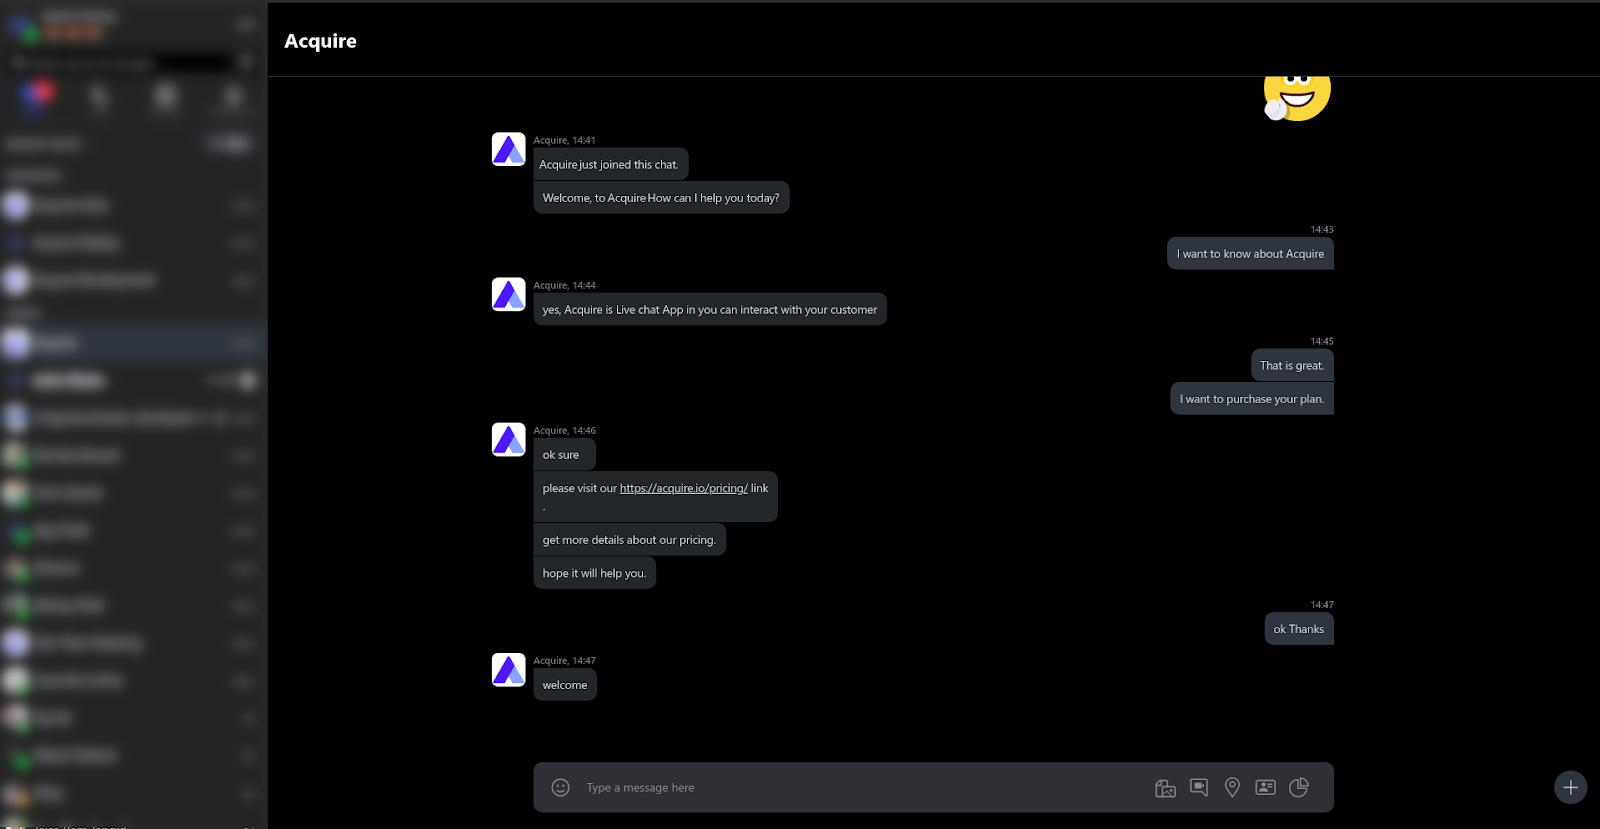
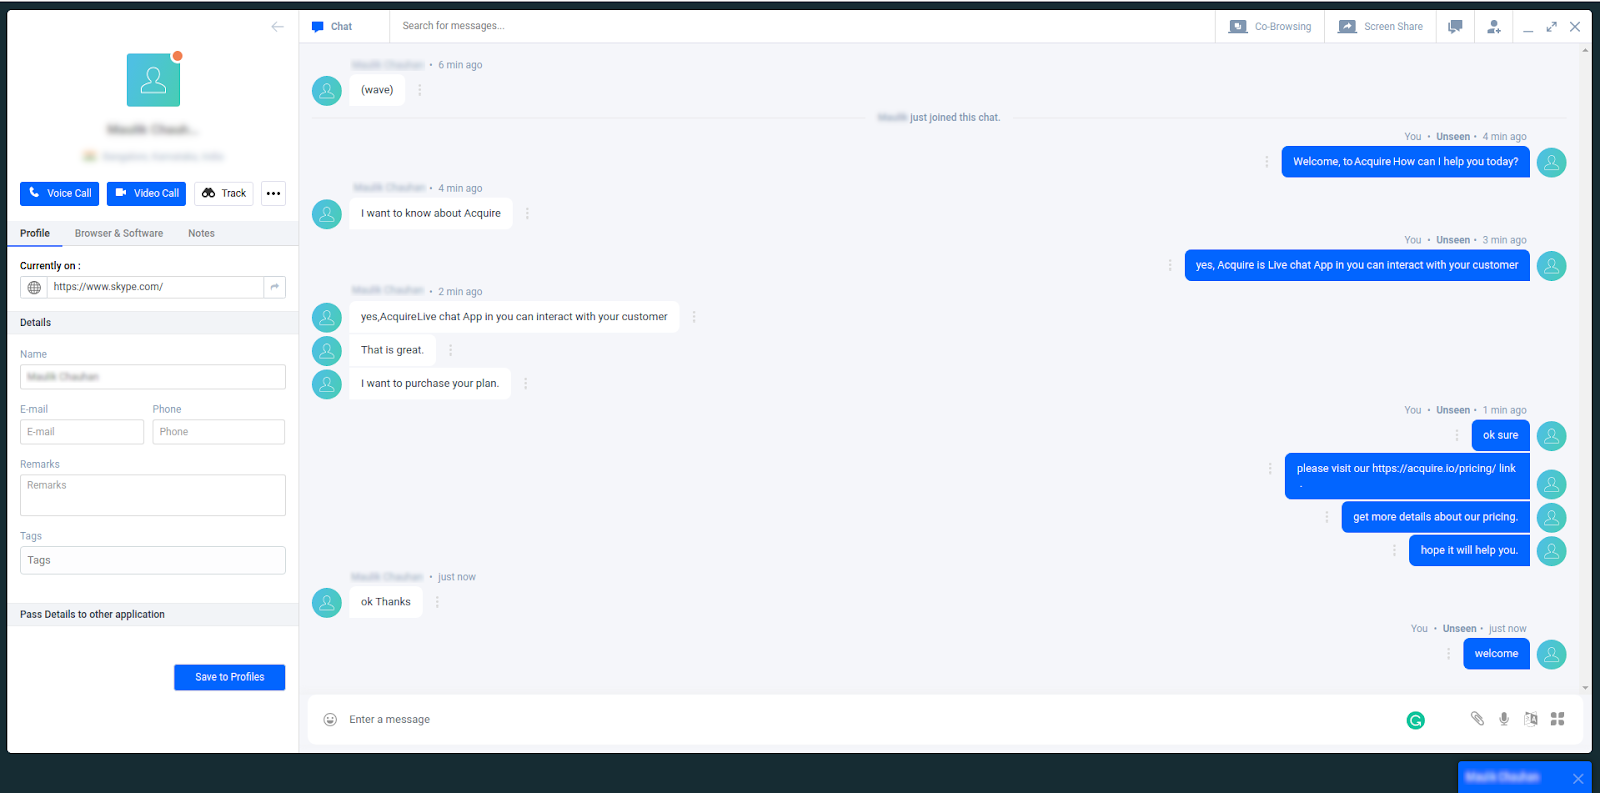
Once fully installed, you will be to view these skype conversations within Acquire.