Settings
For Developers - API, Web Tokens, Webhooks
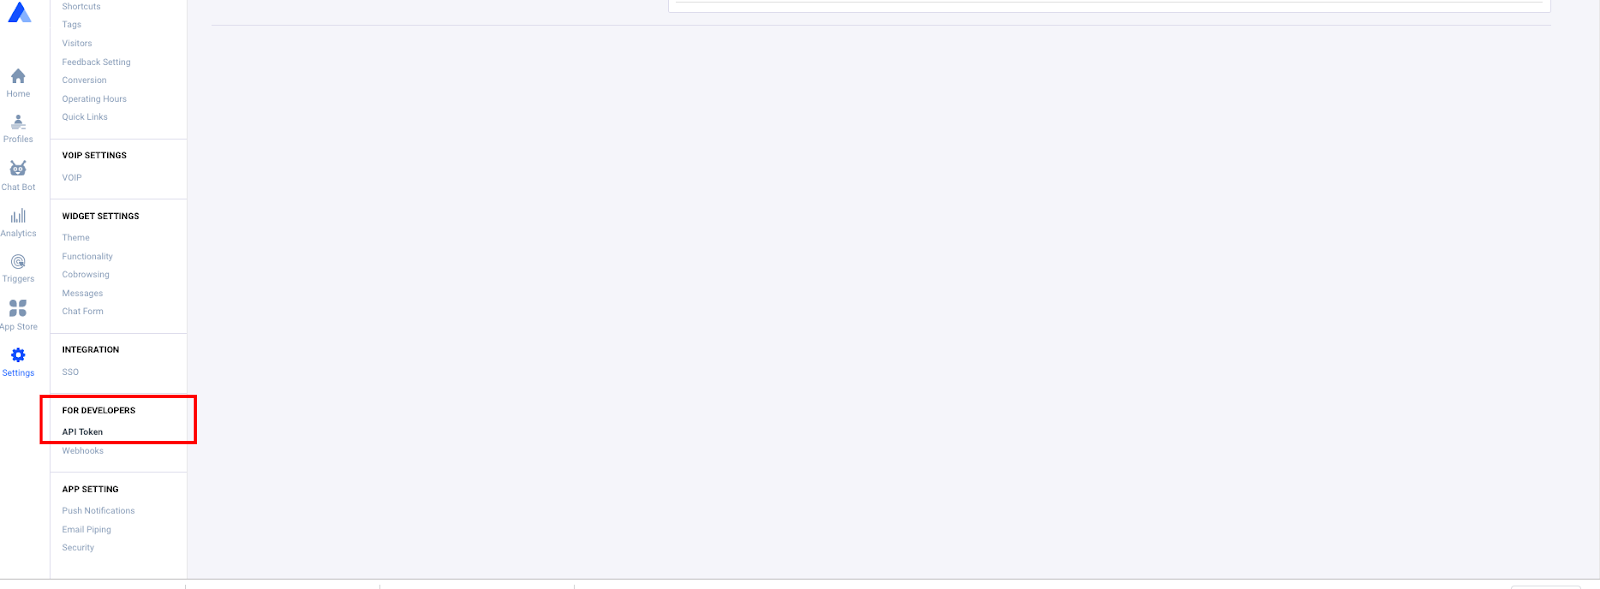
API Token:
API Tokens is a bit of a general term. An API token is a unique identifier of an application requesting access to your service. The service provider typically generates API tokens. You can then match the token they provide to the one you store to authenticate. You can access this under Settings in the For Developers section under API Token.
Here you can generate a new token by clicking the “Generate New Token button,” this token will be accessible for any communication between intended applications.

Web Token:
A Web Token is a standard used to create access tokens for an application. The server generates a token that certifies a user’s identity and sends it to a client. The client will send the token back to the server for every subsequent request, so the server knows the request comes from a particular user identity.

For more information about the Acquire API token and web token, click the link below:
Webhooks:
A webhook is an API concept that’s growing in popularity. As events can describe more and more of what we do on the web, webhooks are becoming even more applicable. They’re incredibly useful and a resource-light way to implement event reactions.
So, what exactly, is a webhook? A webhook (also called a web callback or HTTP push API) is a way for an app to provide other applications with real-time information. Unlike typical APIs where you would need to call for data very frequently to get it real-time, A webhook delivers data to other applications as they happen, meaning you get data immediately. This makes webhooks much more efficient for both providers and consumers.
Webhooks are sometimes referred to as “Reverse APIs,” as they give you what amounts to an API spec, and you must design an API for the webhook to use. The webhook will make an HTTP request to your app (typically a POST), and you will then be responsible for its interpretation.
This setting in Acquire is under Settings >>For Developers >> Webhooks.
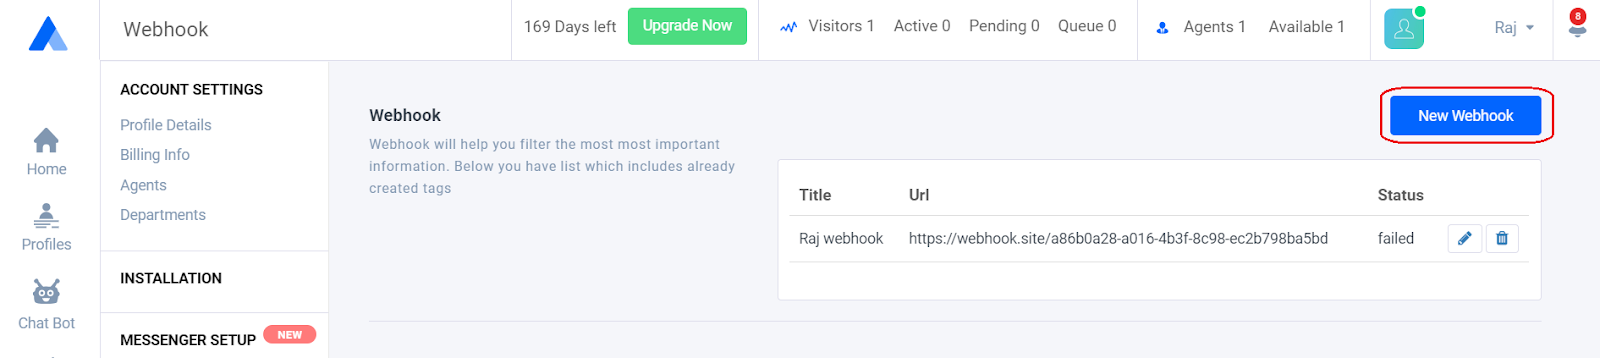
Once you click “New Webhook,” you need to fill out the Title, URL, status, the response type, the chat trigger, and whether you would like it set if a user is online or offline.
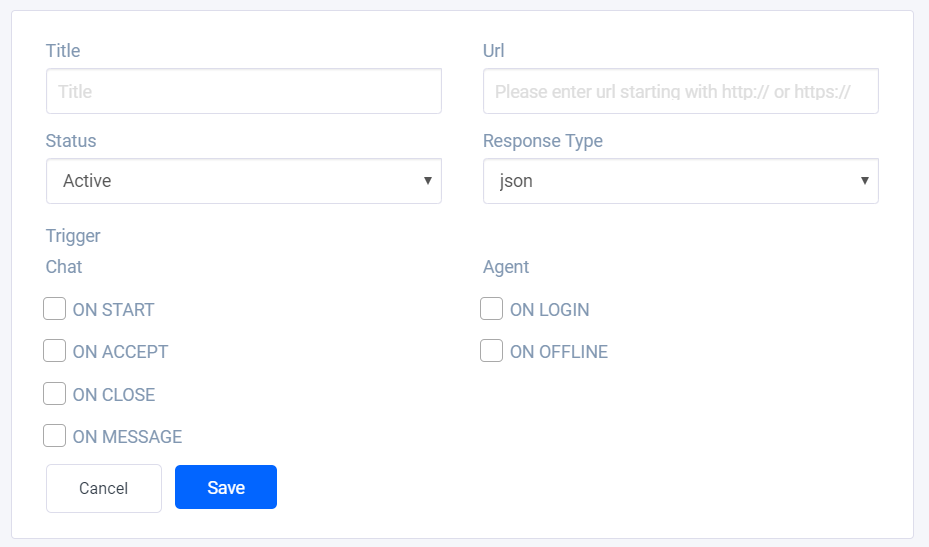
Within Acquire you have 4 Trigger Options:
ON START: This option will allow you to get additional information as soon as the chat starts.
ON ACCEPT: When the chat is accepted, this option allows you to get additional information.
ON CLOSE: This option will allow you to get additional information as soon as the chat is closed.
ON MESSAGE: This option will allow you to get additional information as soon as the user or visitor messages.
After clicking the appropriate checkbox(es) namely ON START, ON ACCEPT, ON CLOSE, ON MESSAGE the chat information will be pushed to your webhook bases on the event occurred.
The data you receive on the webhook will be your choice of either XML or JSON. For more developer information, click the link below:
If you have any questions or need help please contact us on Live Chat or email us at support@acquire.io.